This holiday season I am streamlining my getting-ready process by created a fool-proof look that can be worn for any gathering – and today I’m going to walk you through my process!
The Look
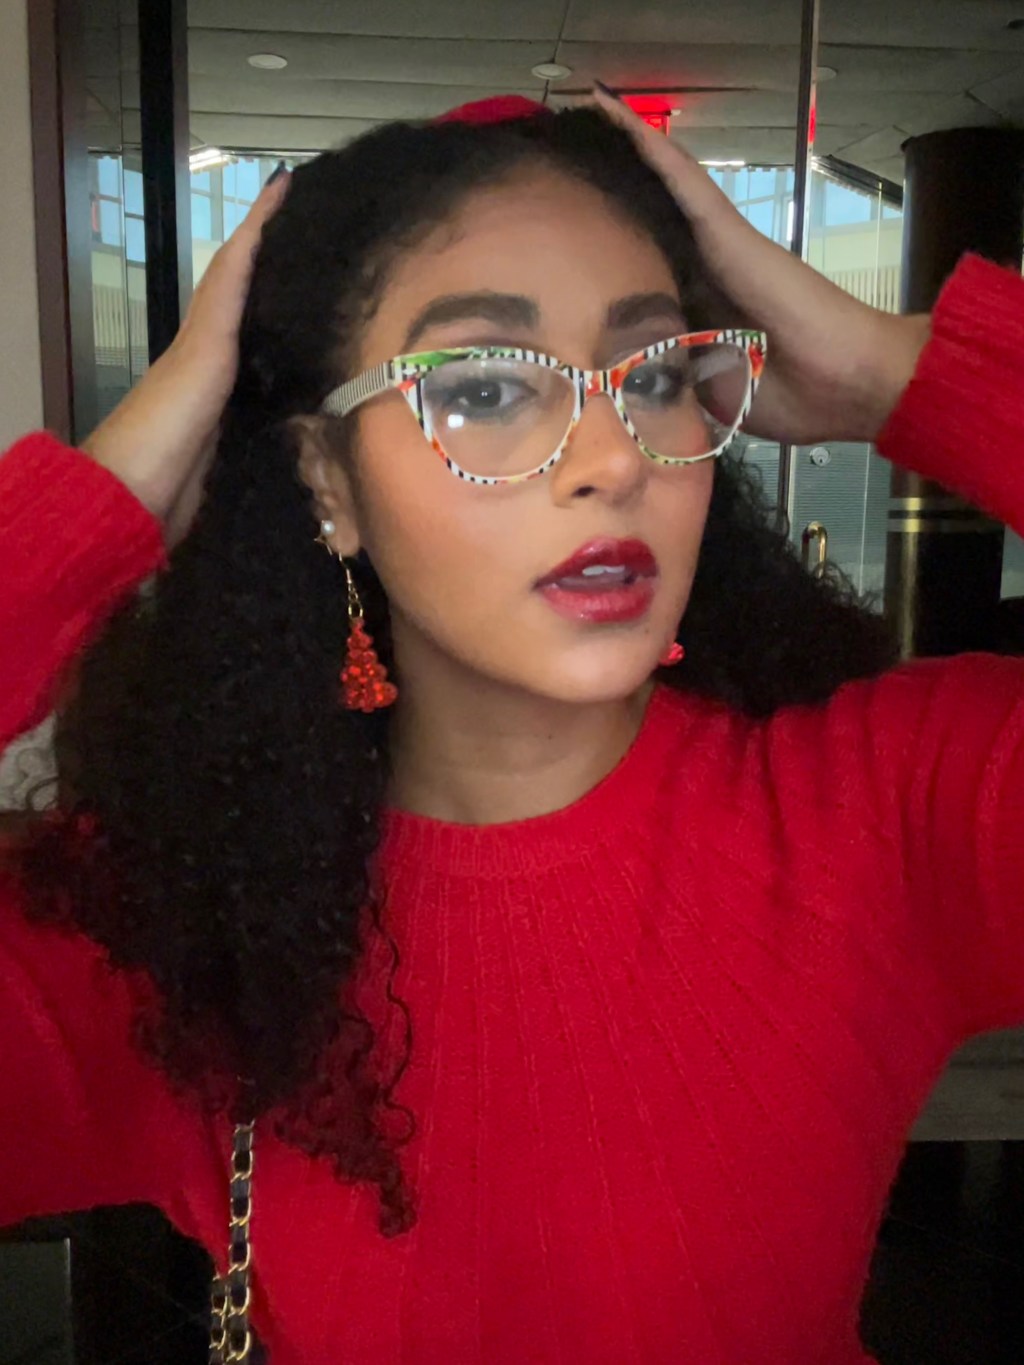
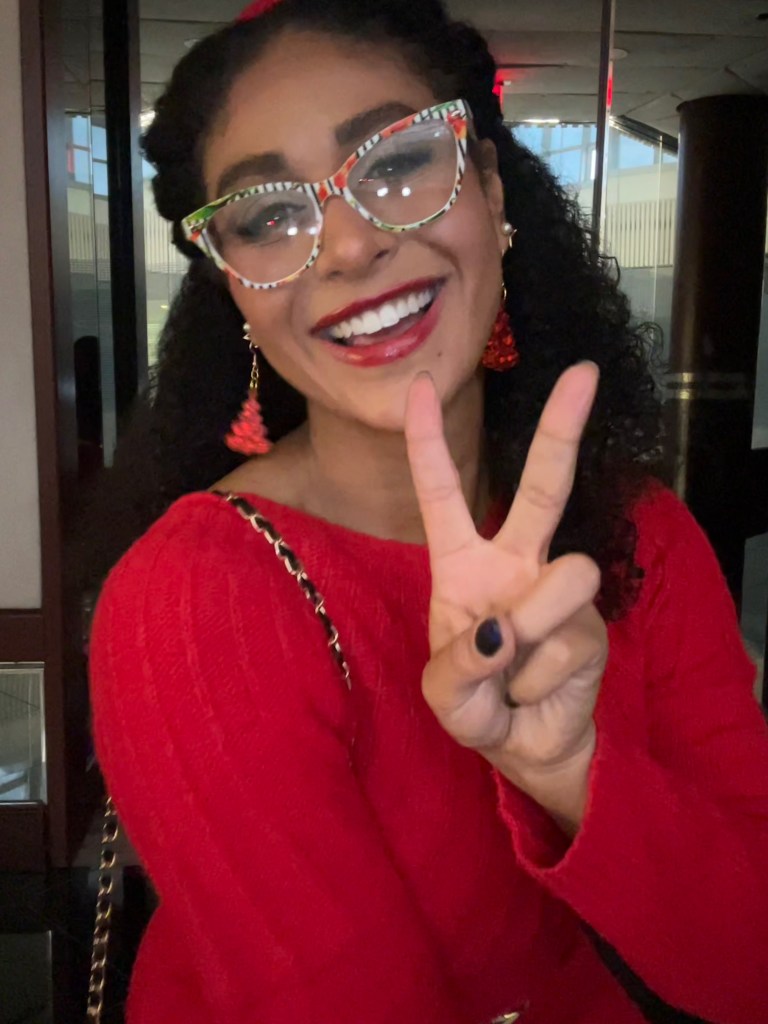
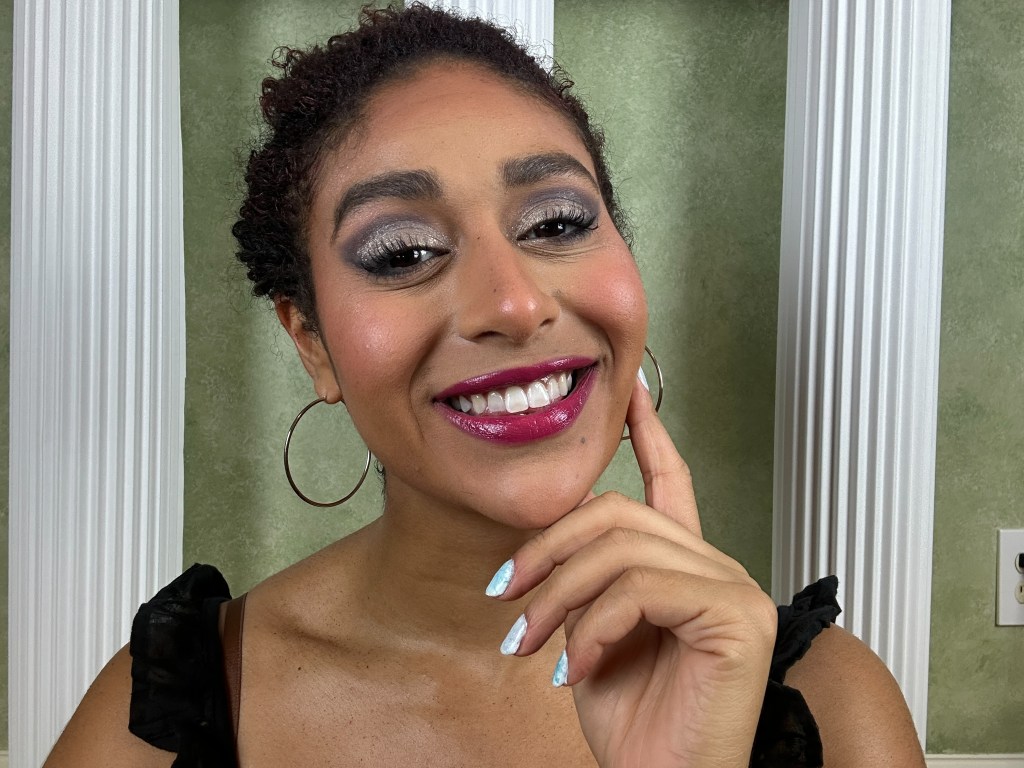
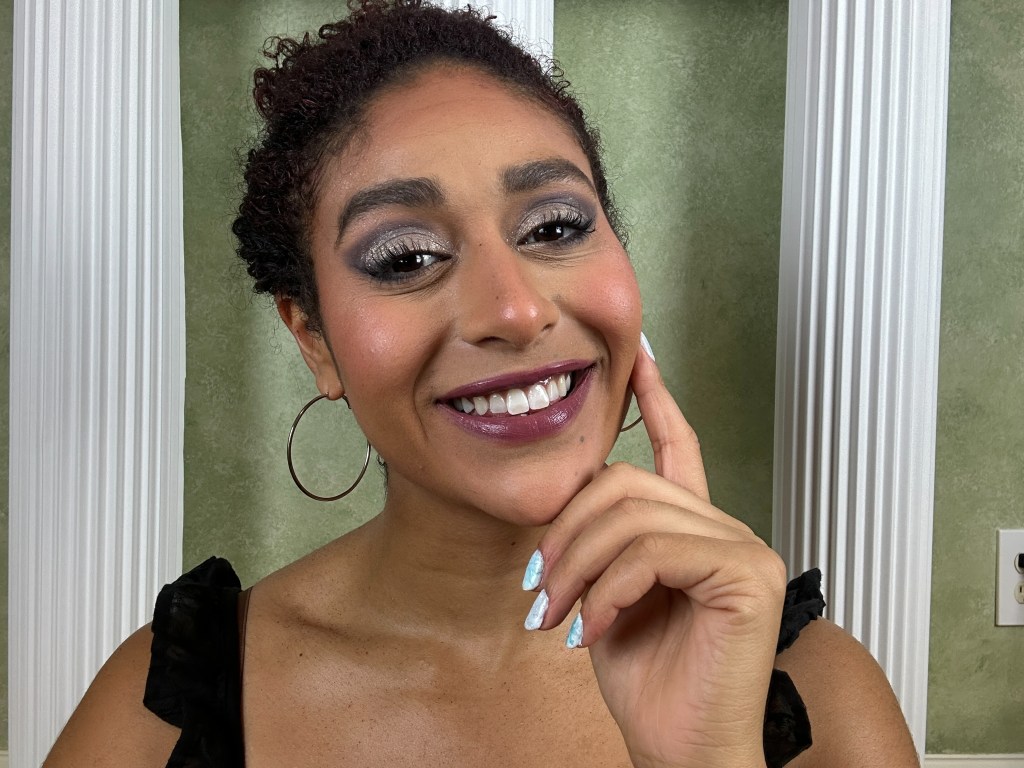
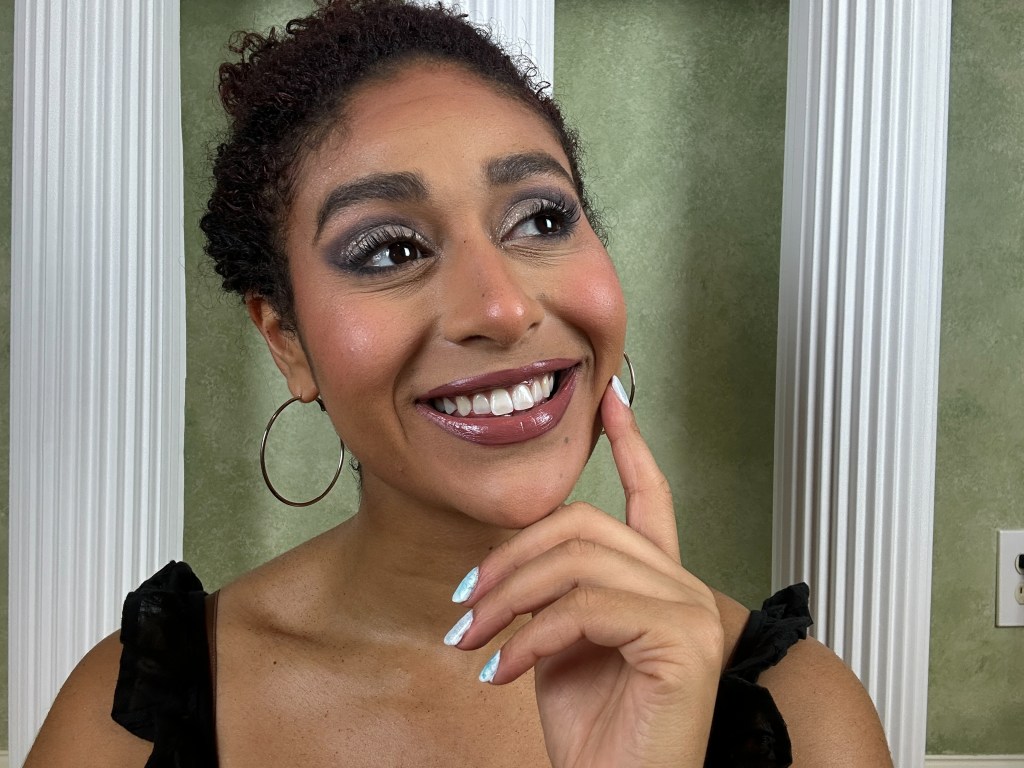
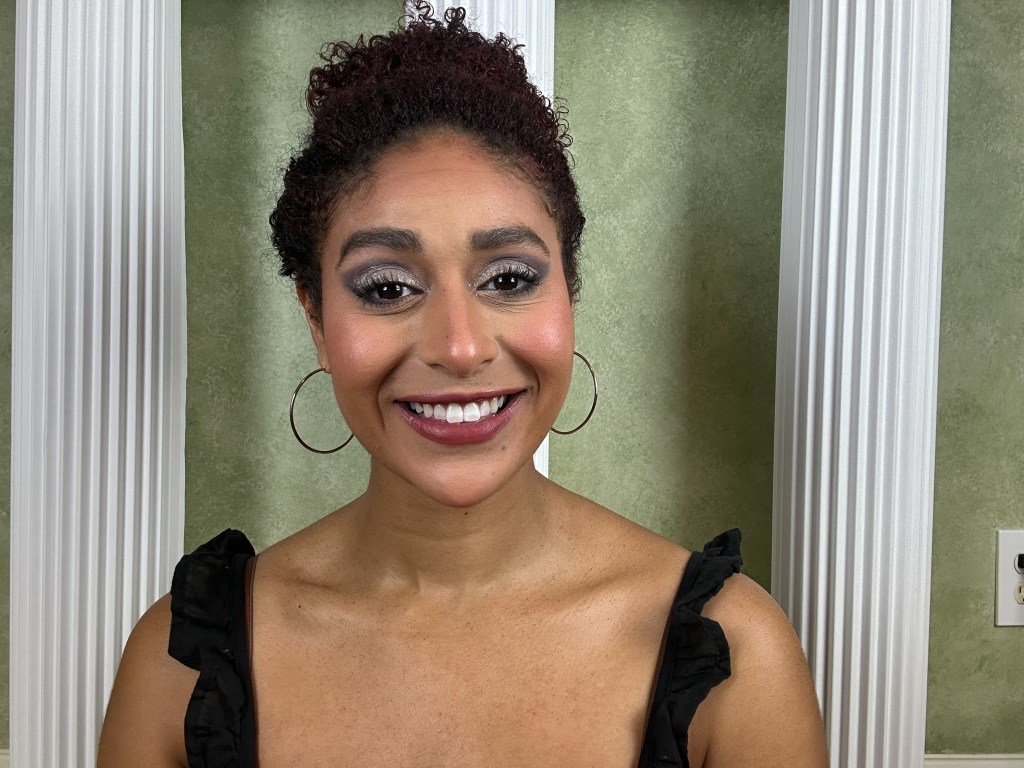
This smokey, silver-shimmer, halo eye looks good on all skin types, consisting of soft grays and silver glitter. You can also substitute the silver for gold shimmer to add some warmth to the look!
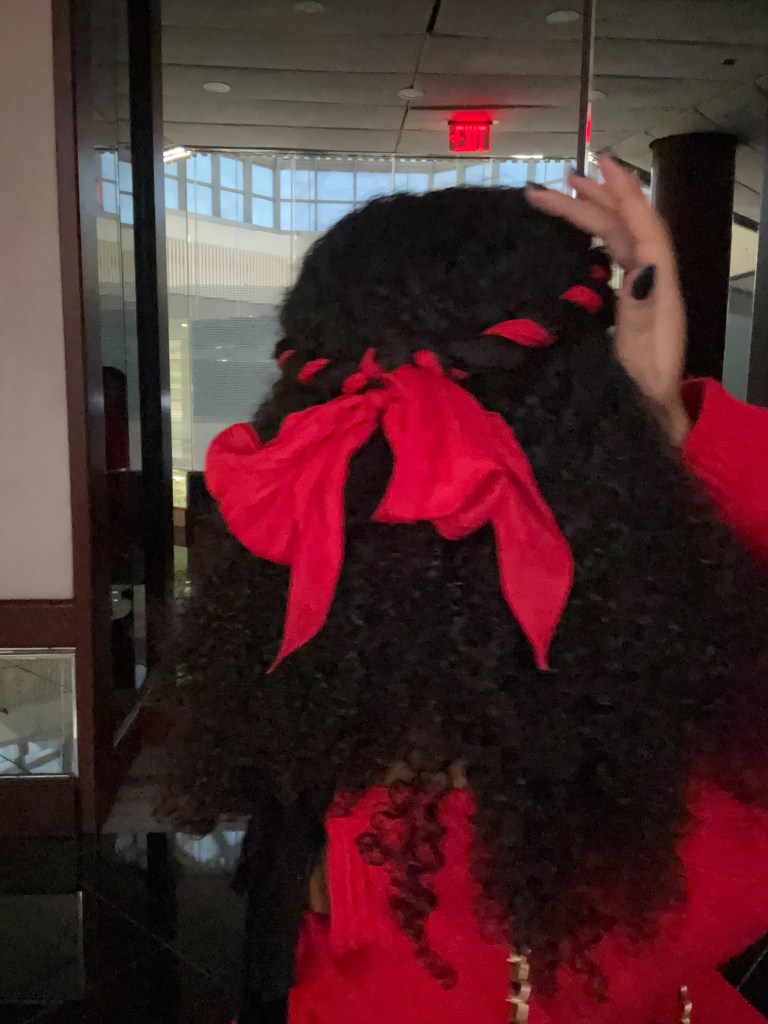
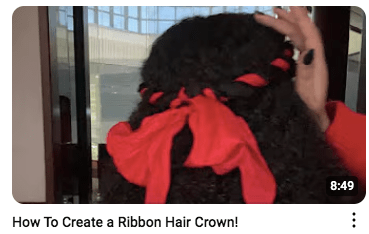
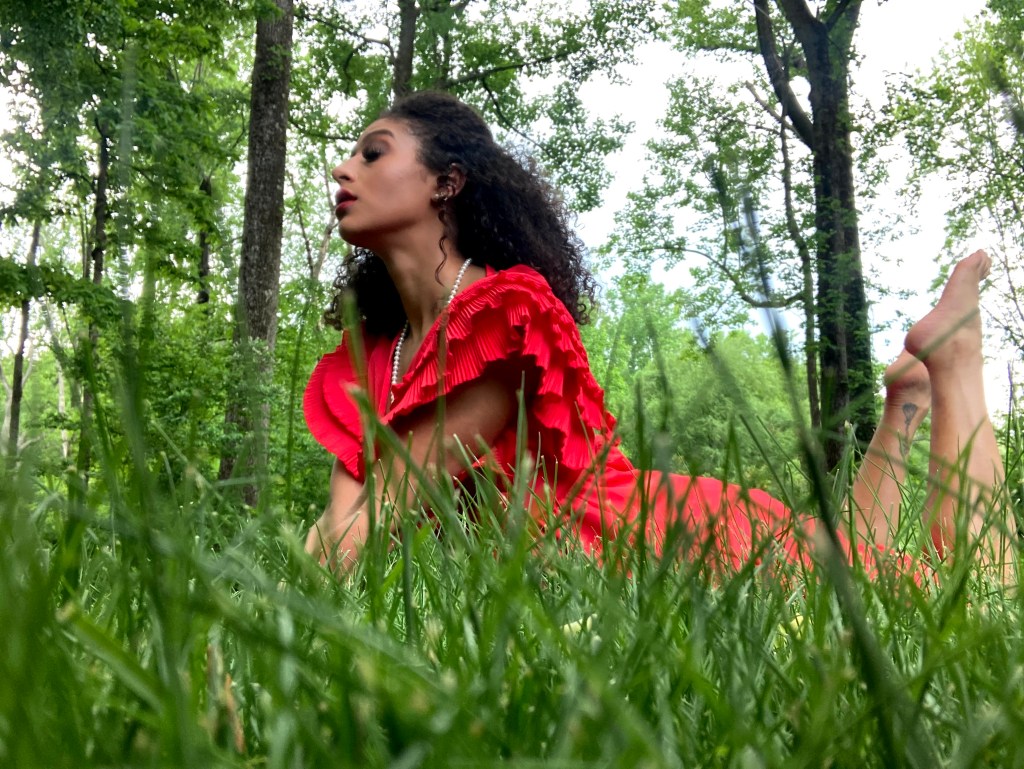
This ribbon crown is one of my go-to hairstyles, so much so that it was the first look I featured in my “Creative & Easy Hairstyles” posts! (You can read post one and post two here!). This time I’ll be using a red silk scarf to create my crown, but you can use any scarf or ribbon to accomplish this look!
And for the first time, you’ll be able to follow along with me by watching the accompanying tutorial videos!

The Makeup
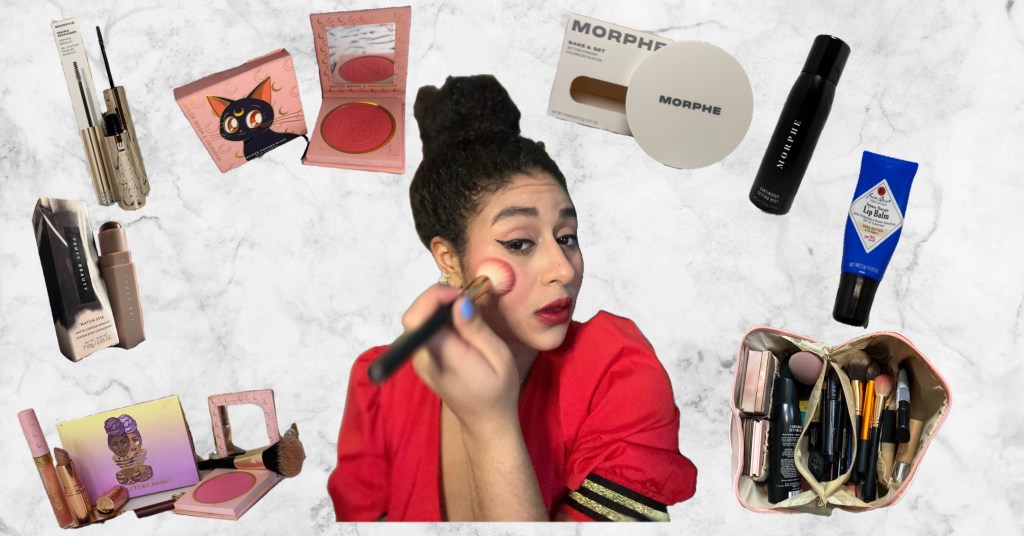
For the holiday season I like to create dramatic, shimmering eye looks to match the season and decor! We’ll be creating a halo look, and I’ll be showing you two variations depending on your available products!
A new trick I’ve been using to help keep my base makeup in place all day long is to apply my primer and foundation, and then immediately seal that in with my setting spray! Follow that with a layer of setting powder and you’ll see a visible difference in the longevity of your foundation! Otherwise, I’ll be following the same steps that I used in my “Base Makeup” post (minus color corrector!).
The Products I’m Using:
- Primer: Sephora Smooth + Blur Primer
- Foundation: Clinique Even Better Makeup in shade WN 94
- Setting spray: Sephora Brand Makeup Setting Spray
- Concealer: Tarte Shape Tape Concealer in shade 27S light-medium sand
- Setting Powder: mix of Sephora Translucent Loose Setting Powder and Kat Von D Lock-It Setting Powder
- Contour: Fenty Beauty Match Stix Matte Contour SkinStick in shade Truffle 04
- Blush: Sailor Moon x ColourPop Pressed Powder Blush in shade Cat’s Eye
- Highlighter: Urban Decay Naked Illuminated Shimmering Powder for Face and Body in shade Aura
- Brows: Benefit Fluff Up Brow Wax & NYX Eye and Eyebrow Pencil in shade Black Brown
To craft this eye look, we’re going to want to be very intentional in where we apply our shadows.
You’re going to start by applying a neutral shadow shade as a base all over your eye, from the lash line to the brow bone. This is going to give you a “slip layer” to allow for better blending going forward!
Next we’ll begin creating our look by applying our lightest shadow shade directly into the crease and following the natural curve of your bone. But, don’t follow the bone all the way down to your lash line – once you’re in line with the outer portion of your eyebrow, move down to the outer corner of your lash line and apply the same shadow shade up towards the tail end of your eye brow. Then, bring your crease shade out towards the end of this other shadow line, sweeping these two points into a triangular shape. This is going to give that feline shape that we’re going for; and we’re going to be applying all three of our shadow shades in this manner and in this location!
The Products I’m Using:
- Eyeshadows:
- Base shade: Sailor Moon x ColourPop Pretty Guardian Sailor Moon Pressed Powder Palette in shade Shining Moon
- Shadow 1: ColourPop Of Quartz Pressed Powder Palette in shade In The Zone
- Shadow 2: ColourPop Of Quartz Pressed Powder Palette in shade Granite Access
- Shadow 3: ColourPop Of Quartz Pressed Powder Palette in shade Opaque
- Lid Shimmer Version 1: concealer, setting powder, shimmer shade; Sailor Moon palette in shade Silver Millennium
- Lid Shimmer Version 2: liquid shadow; L.A. Girl Dream Glitter Iridescent Liquid Eyeshadow in shade Aura
- Eyeliner shade: ColourPop Of Quartz Pressed Powder Palette in shade Rock On
- Eyelashes: Lancome Cils Booster XL mascara primer & L’Oreal Voluminous Waterproof Mascara
Once we get to the eyelid highlight, there’s two different application processes that I have used and enjoy.
The first – and likely the easiest to achieve – is to use a small, flat packing bush to apply a layer of concealer to your eyelid. Then, using the same brush, set with setting powder and apply your shimmer shade on top. That method also works really well if you’re trying to create an eye look with conflicting colors, like this red and green look I created a few years ago!
The second method is to apply a liquid eyeshadow, such as this one by L.A. Girl! Apply this product in the same manner – using a flat packing brush – and apply generously to intensify the shimmer effect!
We’ll finish up the eye look by using the darkest shade in the Of Quartz palette – or a true black shadow if you have one – to create a winged look. Using a liner brush, start at the outer corner of the lash line and bring the wing up towards the tail of your eyebrow, coming back in along the lashline to create a soft liner. Swipe on some mascara primer and some mascara, and your eye look is complete!
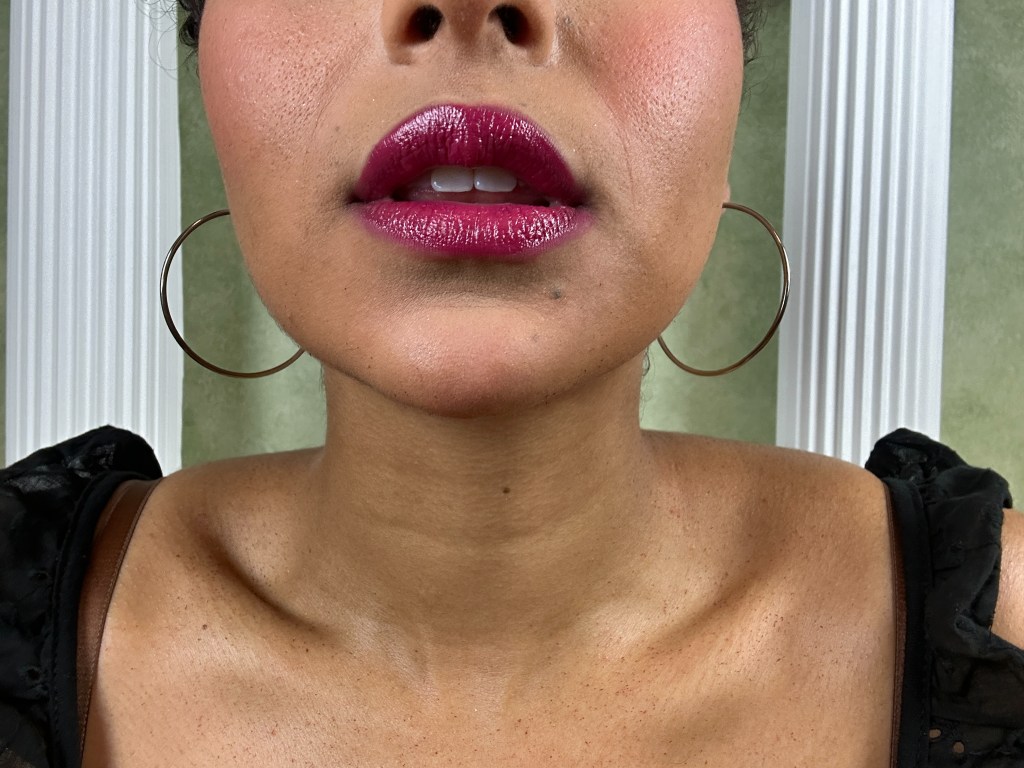
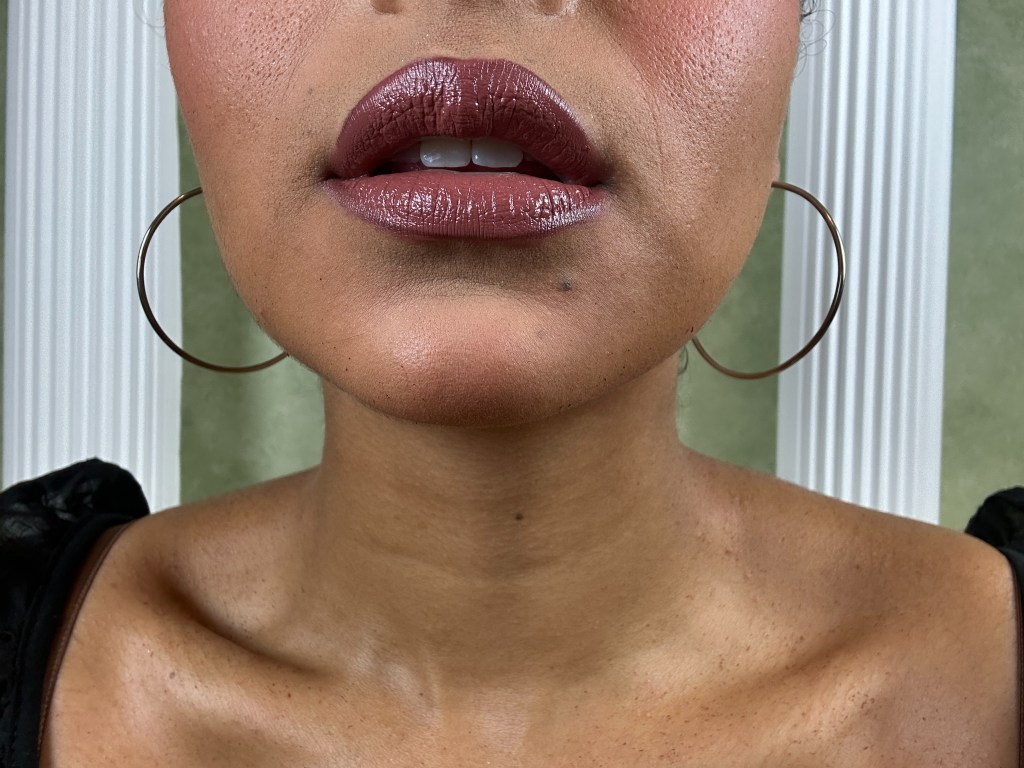
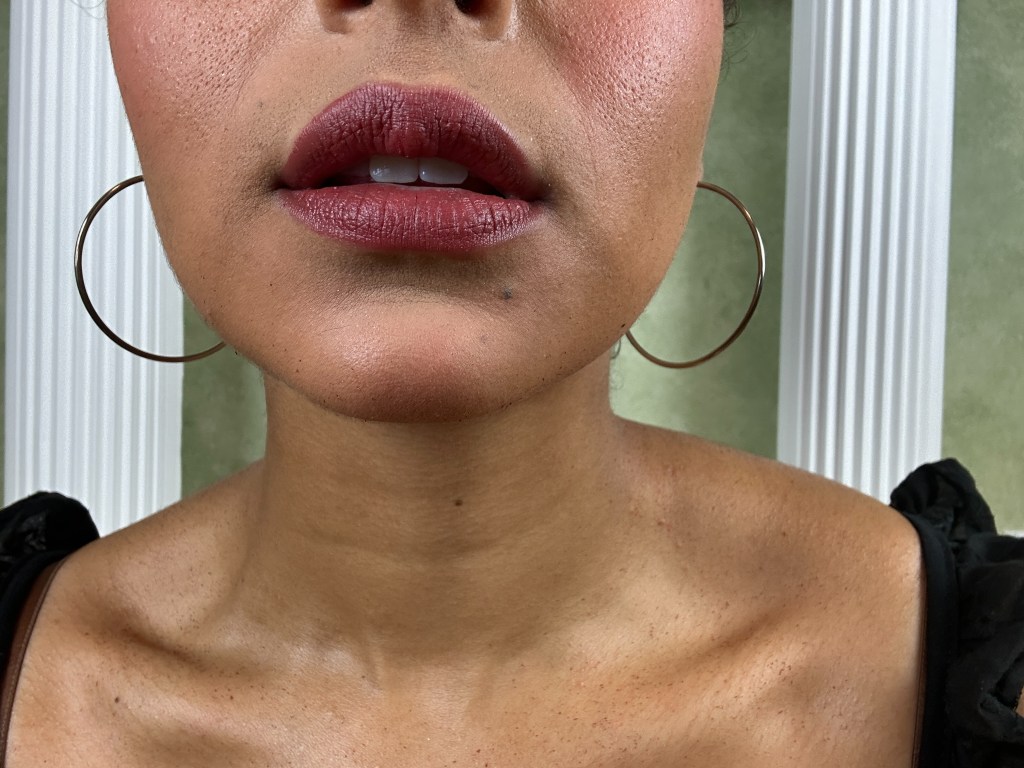
Because we’re creating a dramatic yet monochromatic eye look, you can add a little extra drama by creating a colored lip! I like to opt for a red lip, as I like to wear red to holiday gatherings.
The Products I’m Using
- Red lip
- NARS Velvet Lip Crayon in shade Cruella
- L’Oreal Colour Riche Original Saatin Lipstick in shade Rogue St. Germaine
- Jovani Gloss in shade Blush (or any pale and shimmery gloss!)
This look can be paired with many different lip colors, and I’ve included some below!
Other Lip Variations:
Pink
Barbie x ColourPop Lippie Pencil in shade Malibu Sunset & iridescent pink lip gloss
Mauve
NYX Lingerie XXL Matte Liquid Lipstick in shade Bust-Ed & mauve-ish purple lip gloss

Brown
Fill in lips with Huda Beauty Demi Matte Cream Lipstick in shade SheEO & lined with Huda Beauty Lip Contour 2.0 in shade Rich Brown
Nude/Matte
Bite Beauty Power Move Soft Matte Lipstick in shade Chai – unfortunately this brand no longer exists, but I’ve linked the Temptalia review which shares several dupes!
The Hair
This is one of my favorite ways to tame my most frizzy sections of my hair – the result of growing out my Covid bangs! This is a style I create frequently for work, and it’s easy to change up the overall effect of the look by changing the crown material; either a silk scarf, ribbon, or even twine!
Supplies you’ll need:
- Clips to hold back the rest of your hair (big claw), one to hold the ribbon in place (alligator clip), two to hold your twists in place while working (small claws)
- Spray bottle if you’re working on dry hair
- Scarf
- Braiding bands
To start, begin by sectioning off two sections in the front of your hair (a good rule of thumb is to select the hair in front of your ears), and restraining the rest of your hair in a low bun.
Once you have created the part of your choice, take your ribbon and fold it evenly in half. Leaving the trailing ends loose on either side of your head, place your ribbon on top of your part, and secure to one side using a clip.
Beginning with a small piece from the front of your hair, start to wrap your hair back over the ribbon and stop once the ribbon is on top. Add another small piece of hair to the section you’ve wrapped around the ribbon and repeat the wrapping motion, stopping once the ribbon is on top. Continue to add a small piece of hair and wrapping with the ribbon until you’ve picked up all of the hair you’ve left free on that side. Now, you’ll start wrapping the ribbon around the rest of the section and secure with another clip once you’ve reached the ends of your hair.
Repeat this process on the other side, moving your anchor clip to the side you have already wrapped with ribbon.
Now you have two wrapped sections; you’re going to bring them to the back of your head and wrap them together once, as if you’re tying your shoe. From here, take a braiding band and use it to secure one of your hair wraps near where it meets the ribbon crown. Repeat on the other hair wrap. Depending on the length of your hair, some of the remaining hair that is wrapped in the ribbon will unravel – that’s okay!
To finish off this look, tie the trailing ends of the ribbon into a bow and take down the rest of your hair! You can leave your hair down or even craft a chic updo!
What Do You Think?
What’s your go-to look for the holiday party season? Let me know in the comments below!
I’ll be back next week to share my thoughts on one of the viral Lavish Ivy dresses!
Have a great rest of your week, and remember to SLAY!


Leave a reply to We Aim To Slay Cancel reply