Whether I’m going out for date night, attending a holiday gathering, or competing in a pageant I want my makeup to look flawless. And having flawless makeup starts by applying the correct base products – essentially, anything other than your eye or lip look.
Today I’m discussing the different ways to create a makeup base, and the products I use to achieve picture perfect looks.
As always, you’ll want to start with a freshly washed face, but you’ll want to avoid using products with an oil base otherwise your makeup will literally melt off your face.
Everyday Base v.s. Night Out Base
There are two main camps for makeup looks – everyday or work appropriate looks, and night time or “event” makeup. For me, these are differentiated by which products I’m using – i.e., am I fully covering my face? Or, am I only covering up my “problem areas”?
Primer
No matter what kind of look I’m creating I always start with primer. My go to primer is the Maybelline Master Prime Blur + Pore Minimize (400). If I really want my makeup to last for a long period of time, prior to applying primer I’ll spritz my entire face with the Milk Makeup Hydro Grip Set + Refresh Spray. I like to apply my primer with my hands, focusing on the center of my face and working outwards.
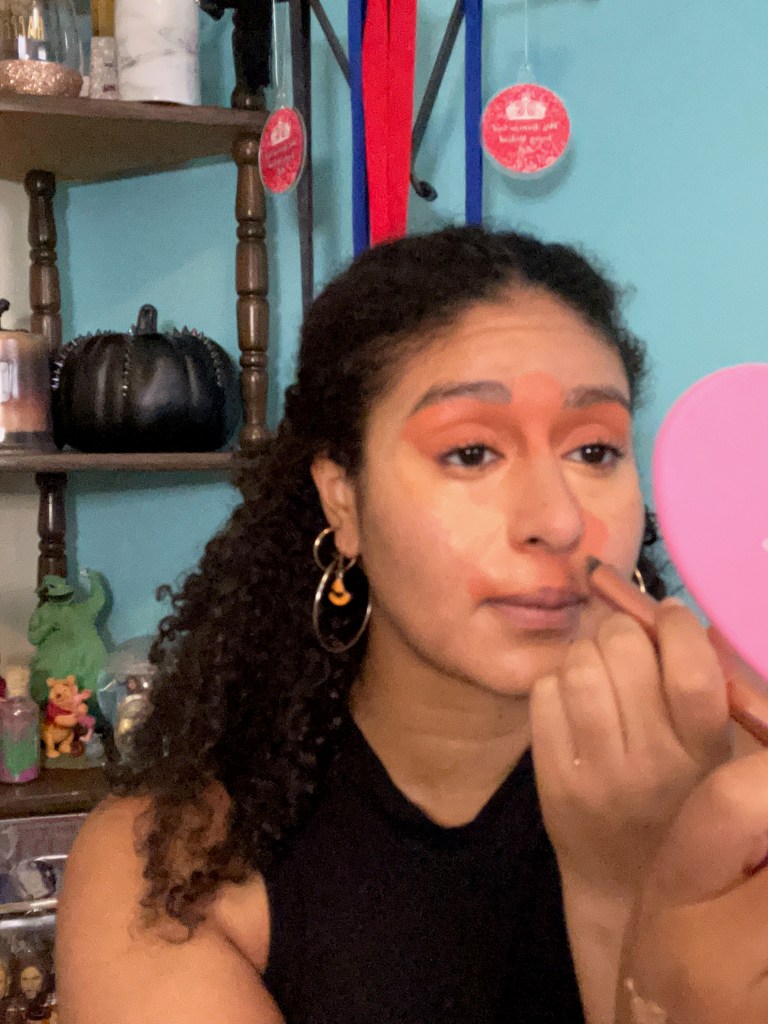
Color Corrector
There are many types of color correctors, and their name explains their use – they are used to correct the color of certain spots on your face. I only use a color corrector if I’m creating a full face to shoot looks or to go out for a long evening such as New Year’s Eve.

Think back to your earliest art class in school and picture the color wheel – if you’re trying to cover redness, you’ll want a green color corrector. If you’re trying to cover blueish hues, you’ll want an orange color corrector. And, if you’re trying to cover purplish hues, you’ll want a yellow color corrector, and vice versa.
My under eye area tends to be a very blueish color, so I like to use the L.A. Girl Pro Conceal HD High-Definition concealer in shade GC990 Orange Corrector (neutralizes dark tones). I apply this product under my eyes, between my brows, and above my top lip, and I use a concealer brush to blend it out. While blending, I’ll bring the product up onto my eyelids to cancel out those blue shades as well.
Concealer
There are two concealers that I love – the Lancome Teint Idole Ultra Wear All Over Concealer in shade BIS ![]() 62U100 & the Tarte Shape Tape in shade 27S light-med sand.
62U100 & the Tarte Shape Tape in shade 27S light-med sand.
For everyday looks, I’ll apply the Lancome concealer immediately following my primer, focusing on my under eye area.
For full face looks, I’ll apply the Tarte Shape Tape directly on top of the color corrector and use the same concealer brush to blend out the Shape Tape. I’ll then add another round of this concealer after foundation, blending with a damp sponge.
If I’m going to a day time event, such as a pageant, I might skip the color correcting step, and jump straight to the Shape Tape concealer.

Foundation
I don’t wear foundation for everyday makeup, so when I create a full face of glam I like to use Clinique’s Even Better Makeup SPF 15 or Stay-Matte Oil-Free Makeup, both in shade WN 94, depending on the finish I prefer.
Using either a stippling or a flat foundation brush, I’ll focus on covering the outer areas of my face, blending the remaining foundation over where I corrected and concealed. After applying, I’ll blend out the product using a damp sponge.
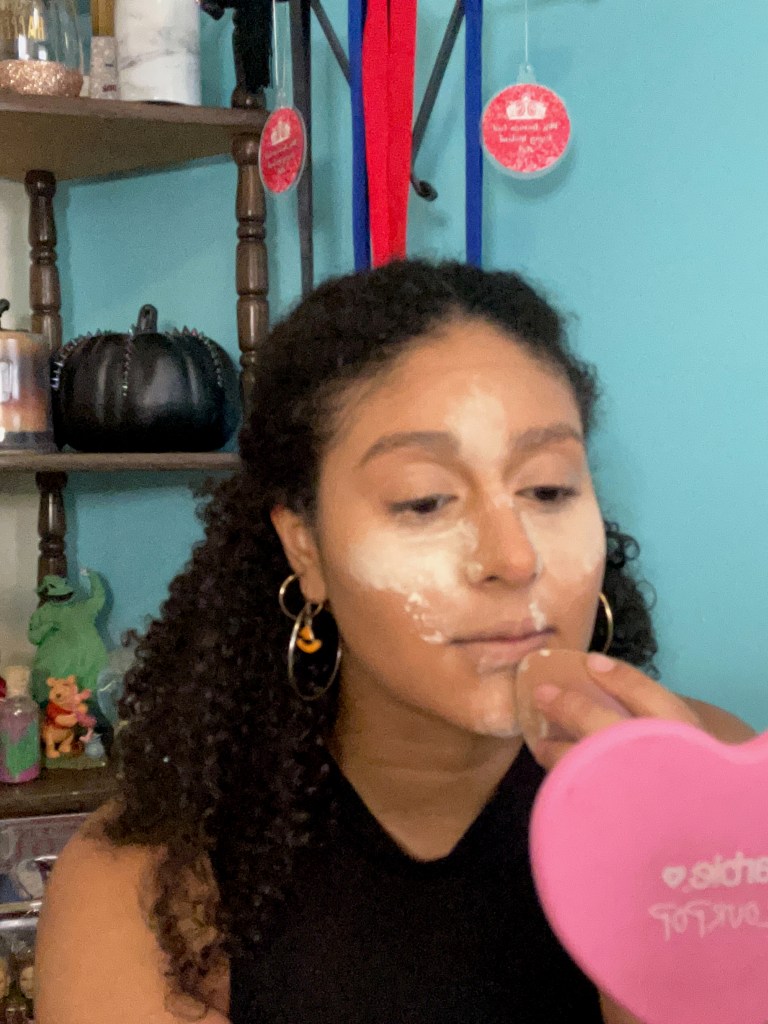
Setting Powder/Bake to Set
After applying the second round of concealer, I’ll use a translucent loose powder to bake (using a damp sponge to pat the powder) my under eyes, my forehead, and the space along my lower cheeks in between where I’ll contour my cheekbones and jaw. I like to use the Morphe Bake & Set Setting Powder, but any setting powder in shade translucent will work.
For my everyday makeup look, I’ll use a fluffy brush to pat powder all over my face, and then using the same brush, I’ll buff along the edge of my face moving in towards my concealer.
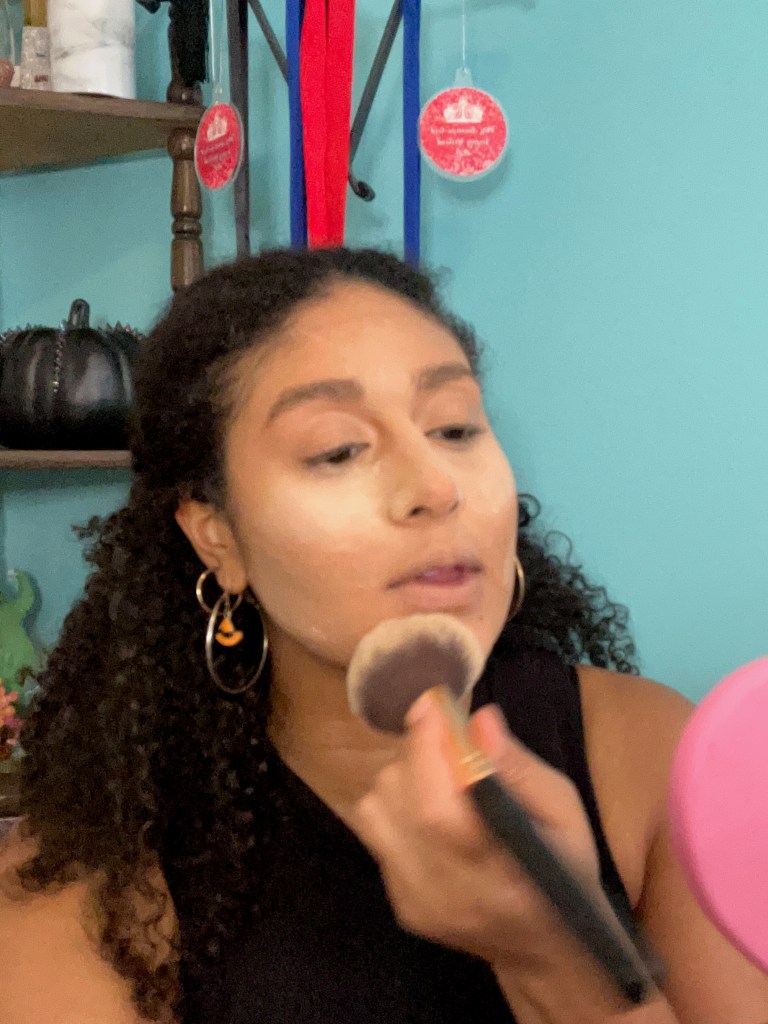
Contour

I don’t always use a bronzer/contour product for my everyday looks, but when I do, I like to use a buffing brush to apply the Tarte Cosmetics Park Ave Princess Amazonian Clay Matte Waterproof Bronzer. I apply my bronzer along the hairline of my forehead, my temples, below my cheekbones, along the curve of my jaw, down the sides of my nose, and along the tip of my nose. Using the same brush, I’ll blend the product out.
For a more defined evening look, I’ll use the Fenty Beauty Match Stix in shade Truffle 04. I apply this product in the same spots as the Tarte bronzer, and I’ll blend out the product using the same brush I used to apply the Tarte bronzer. In the moments when I apply too much contour and I’m having trouble blending with the brush, I’ll bounce my damp sponge in an upward motion.
Blush

Now to add some color back into the face; I apply my blush in a patting motion, moving from the apple of my cheek up towards my temple. I’ll also pat a bit of blush across the bridge of my nose, and along my forehead to mimic being out in the sun.
I’ll use this technique for both an everyday look and a full glam look, adding more blush depending on the look.
Because of my more olive-based undertones, I like to use a peachy blush shade. Ever since I bought the Sailor Moon x ColourPop collection I’ve been obsessed with the Pressed Blush Powder in shade Cat’s Eye.
For some of my everyday looks, I’ll sweep this blush across my eyelids as well in order to add some color without committing to eyeshadow.
Highlight
My all time favorite highlighter is the Urban Decay Naked Illuminated Shimmering Powder for Face and Body in shade Aura. I like to use a clean contour brush to swipe the product along the top of my cheekbones, up around the arch of my eyebrows, down the bridge of my nose, and along my cupids bow.
At this point, I’ll do a round of setting spray before continuing onto my eyebrows.
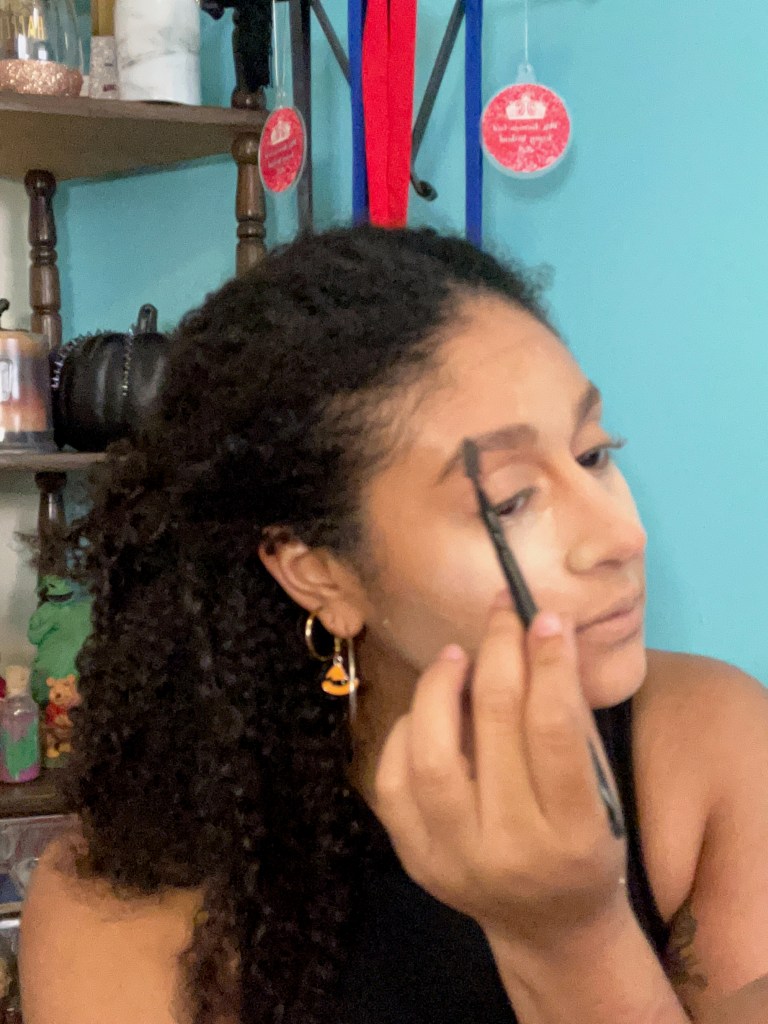
Eyebrows
To fill in my brows, I start my brushing them with a brow wax, either the Milani Stay Put Liquid Brow Wax Longwear brow wax in shade 110 or the Benefit Cosmetics Fluff Up Brow Wax Flexible Brow-Texturizing Wax. For everyday looks I’ll fill in my brows with the Anastasia Beverly Hills Brow Powder Duo in shade Ebony using an angled eyeshadow brush. For a more dramatic look, I’ll use the Nyx Eye and Brow Pencil in shade SPE931 Black Brown to create a stronger brow.
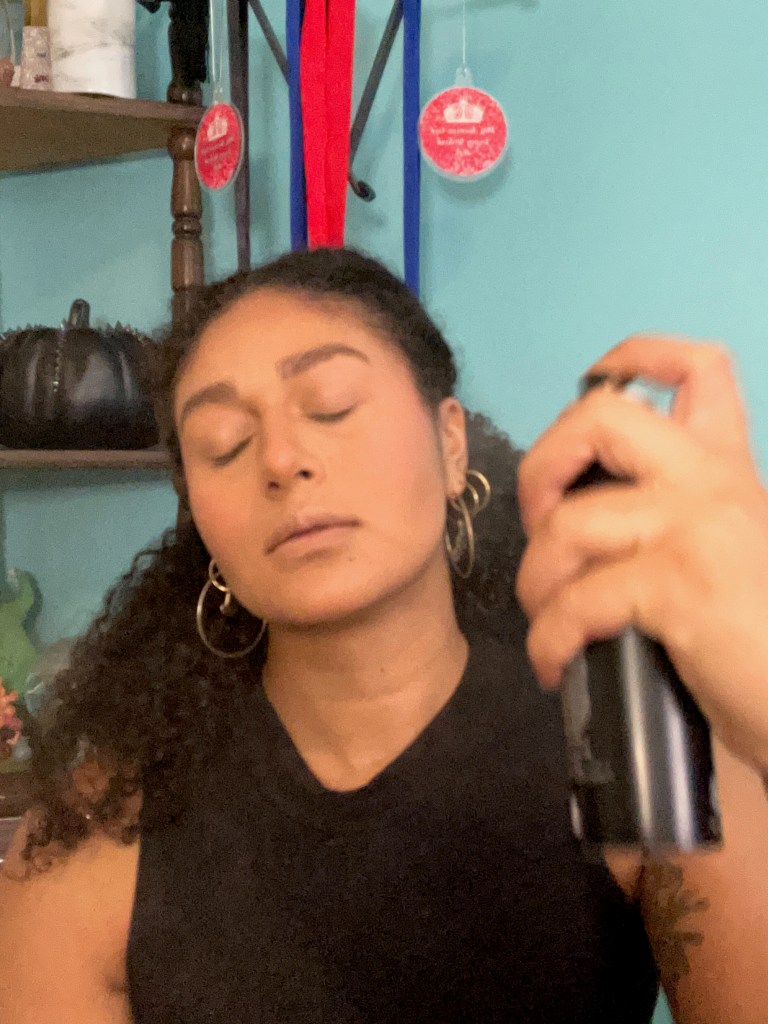
Setting Spray
The setting spray I love the most is the Morphe Continuous Mist, and I use it to finish every look, whether it’s an everyday simple look or a full glam.
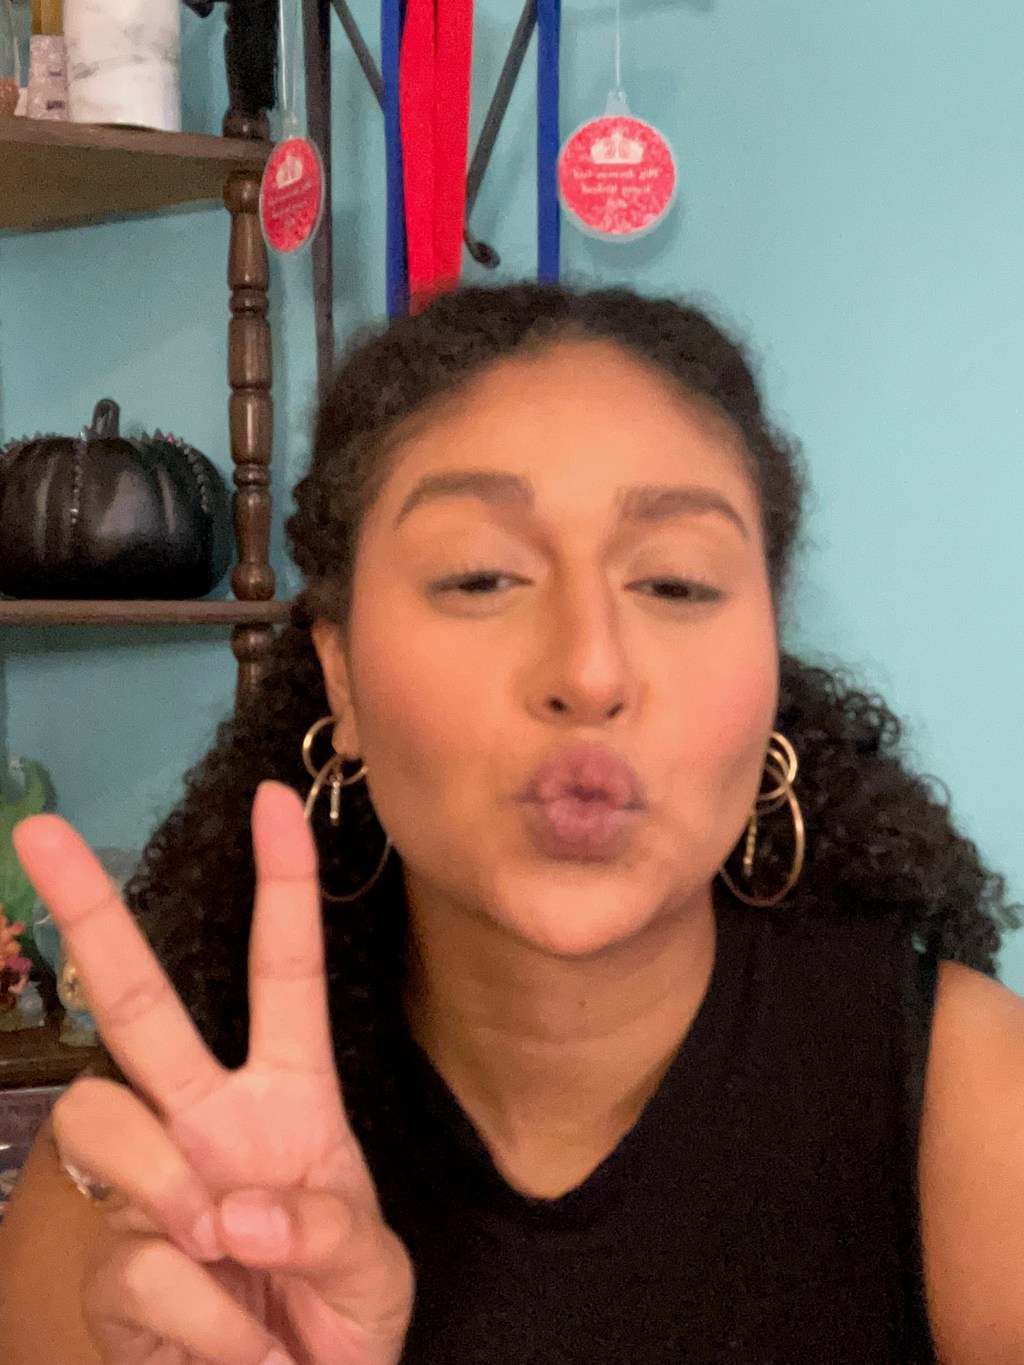
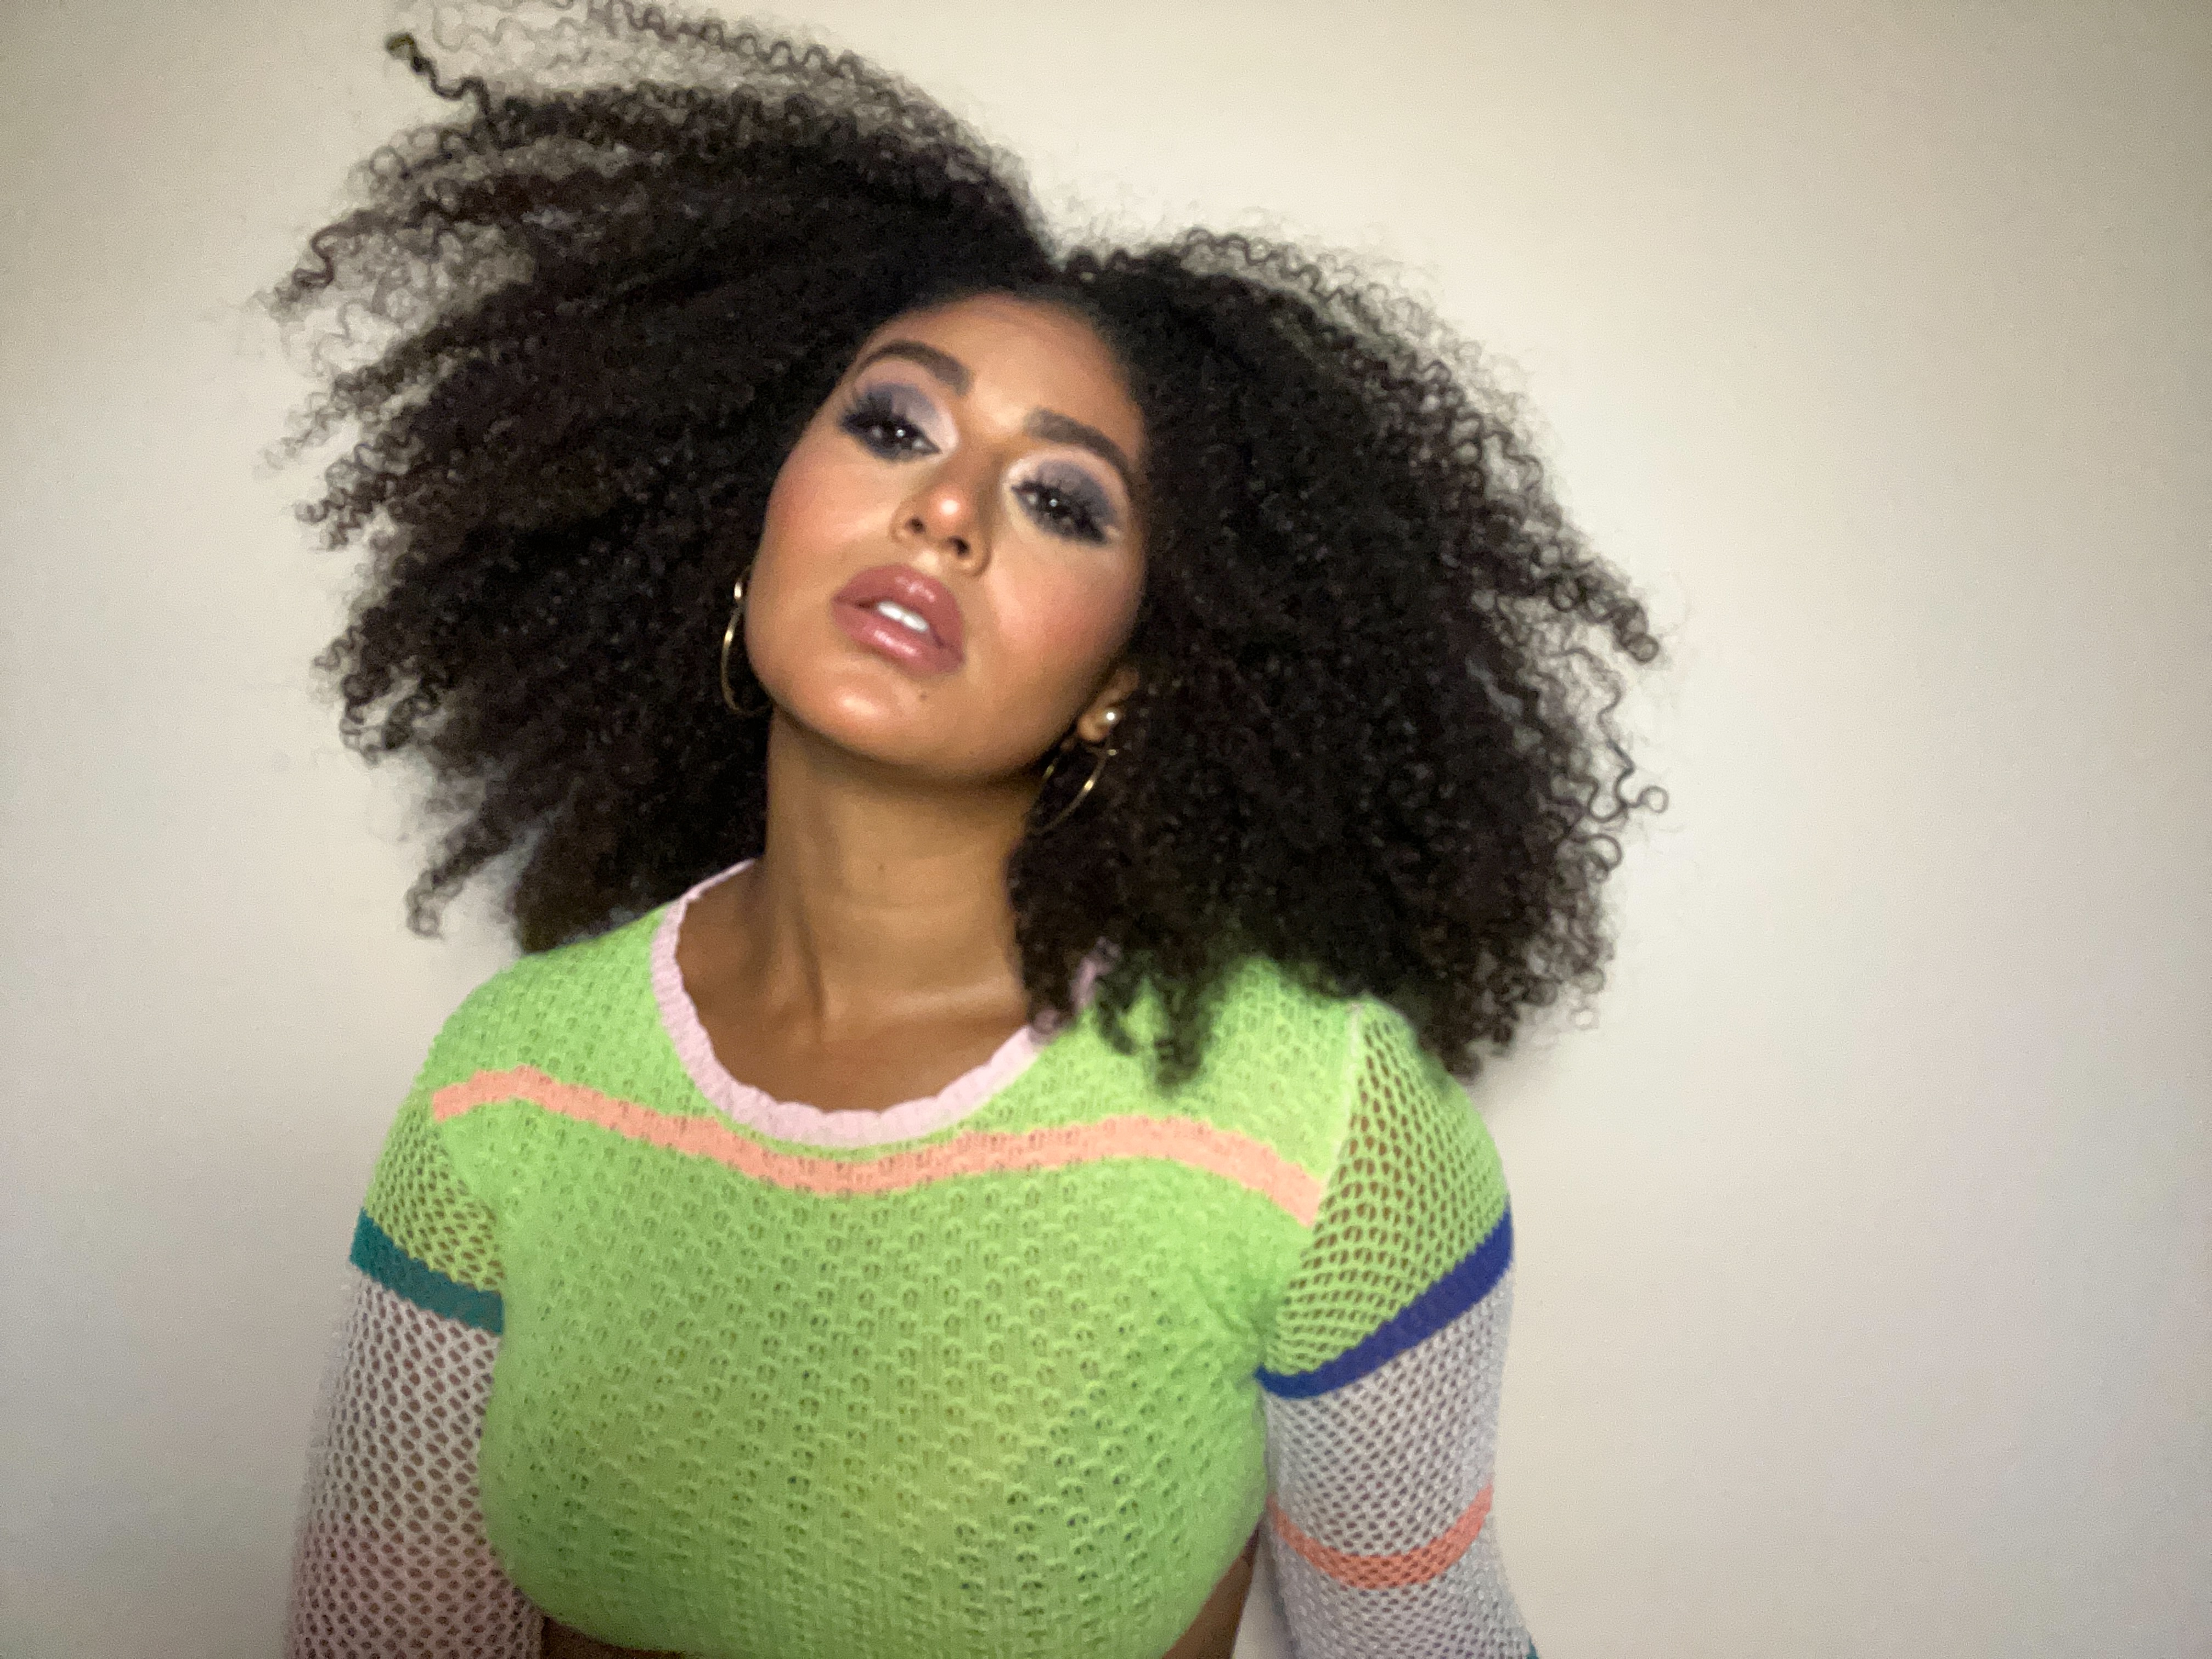
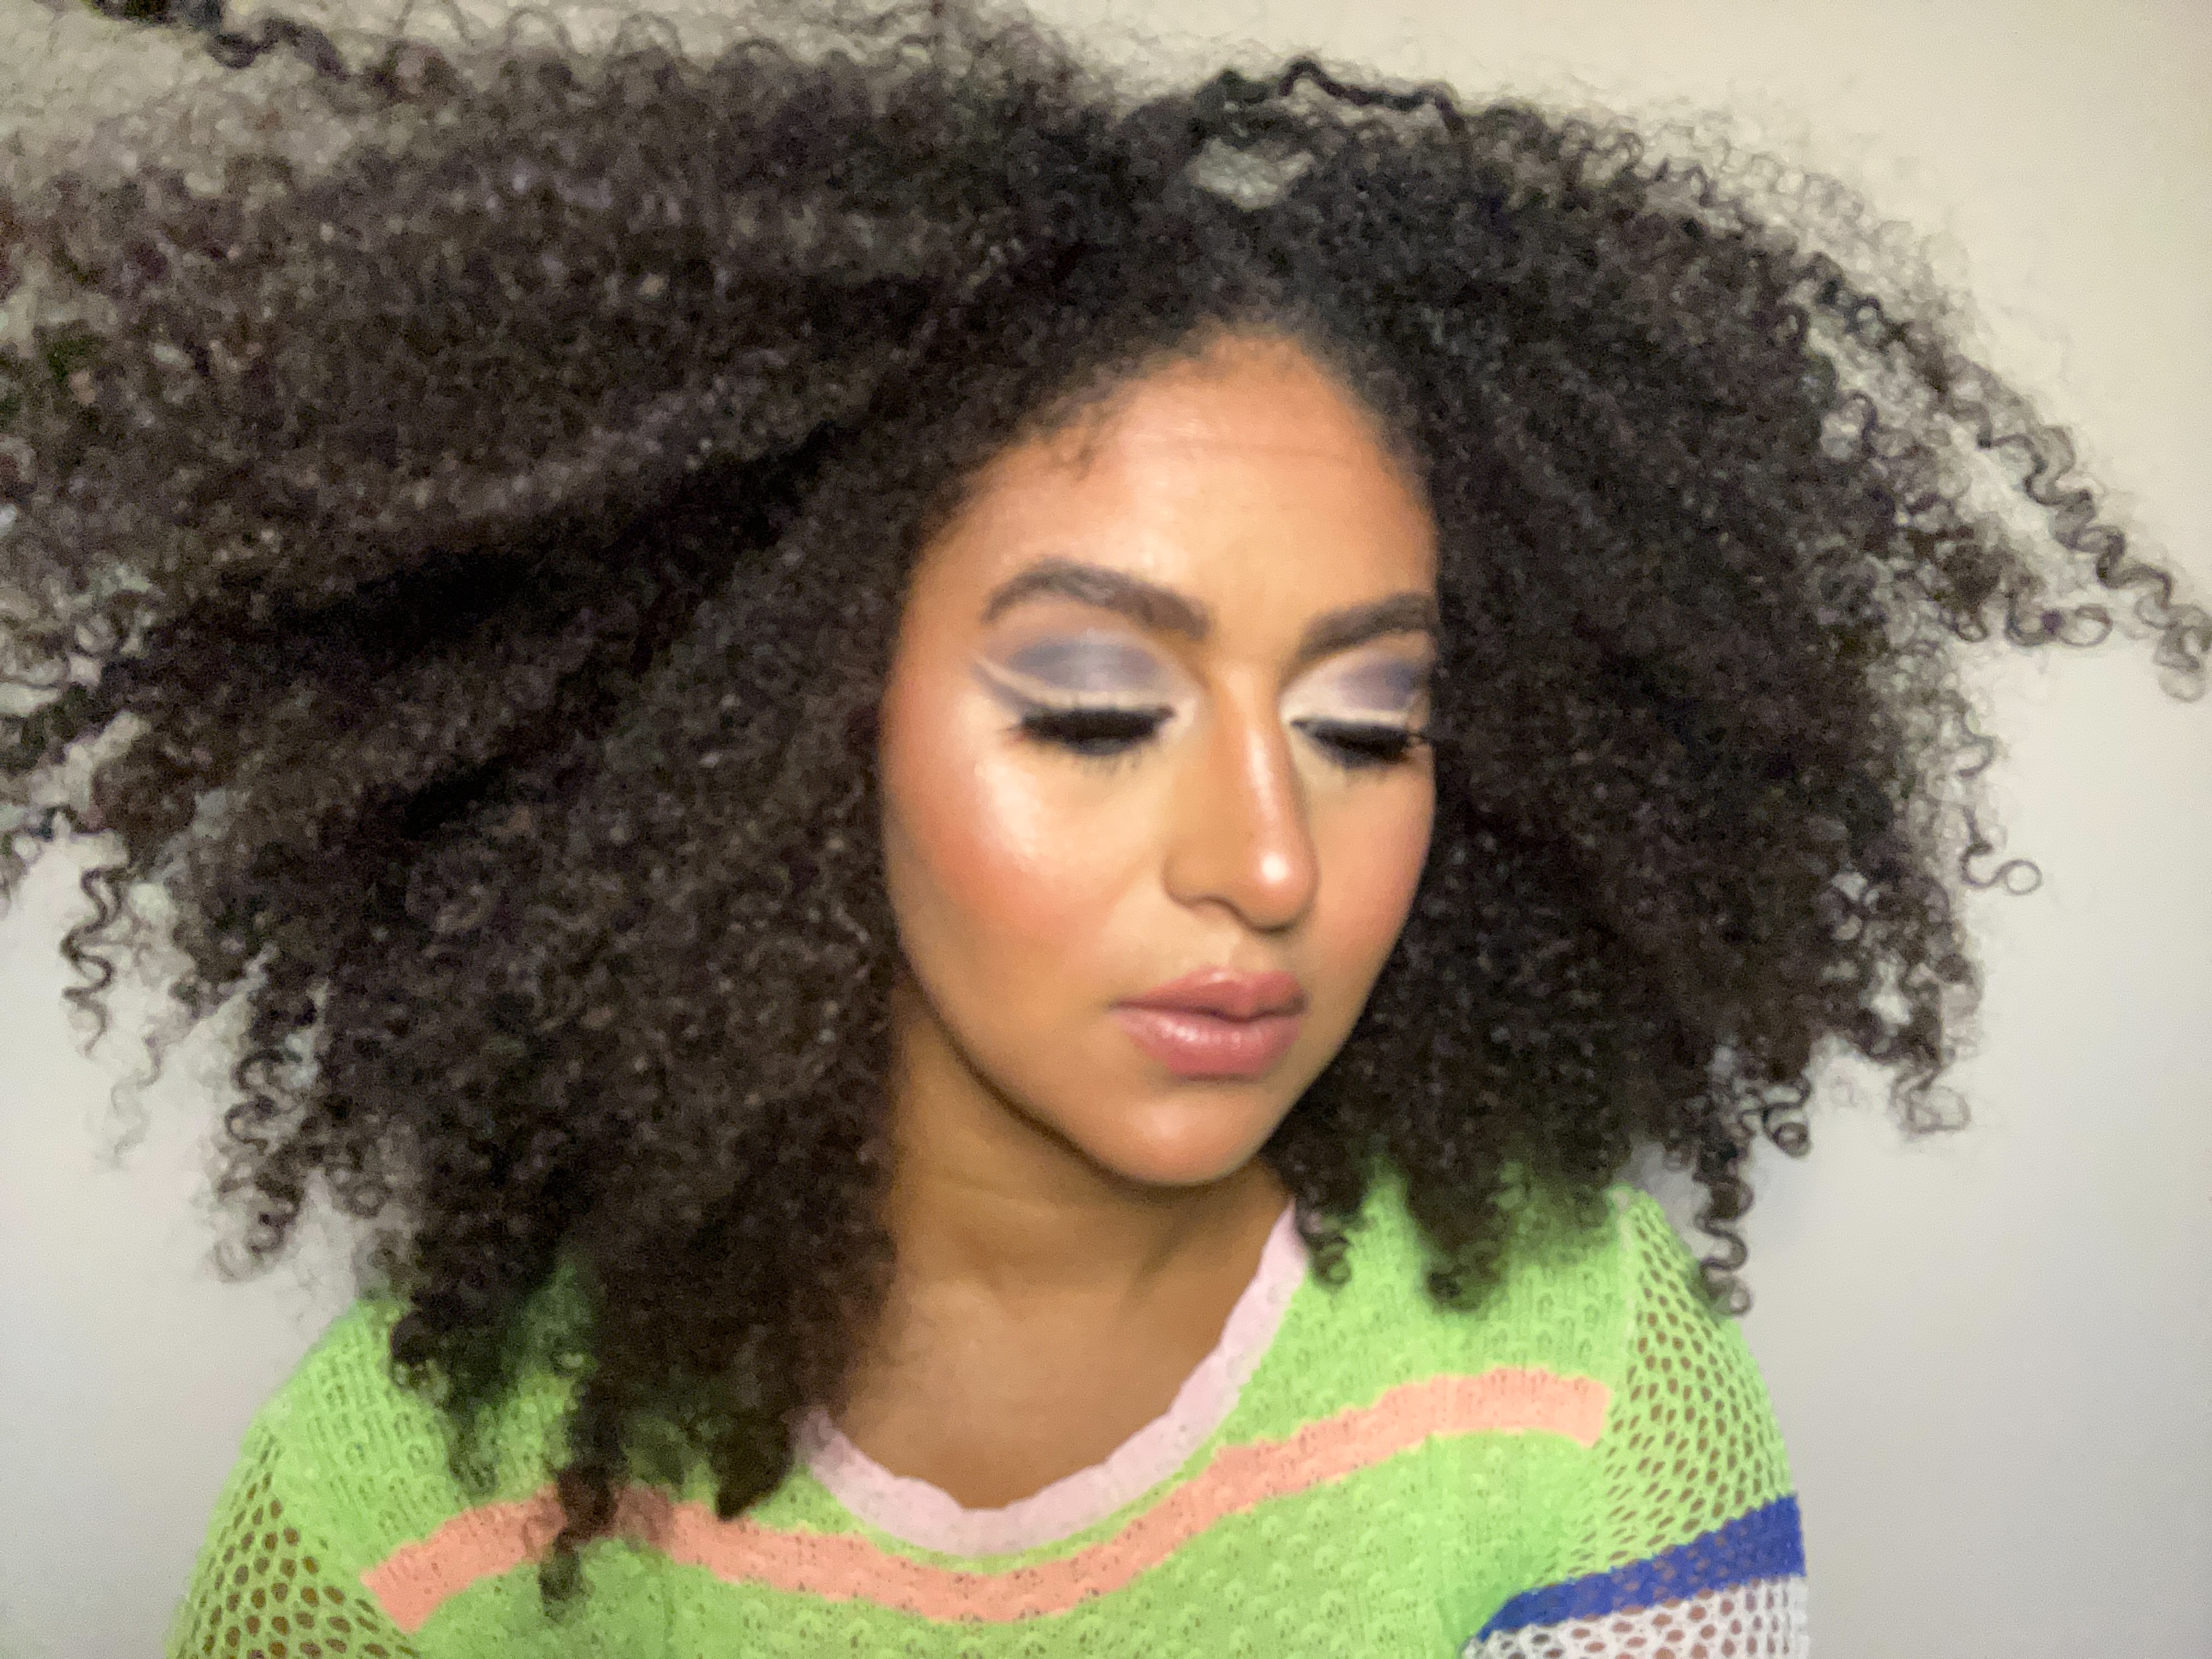
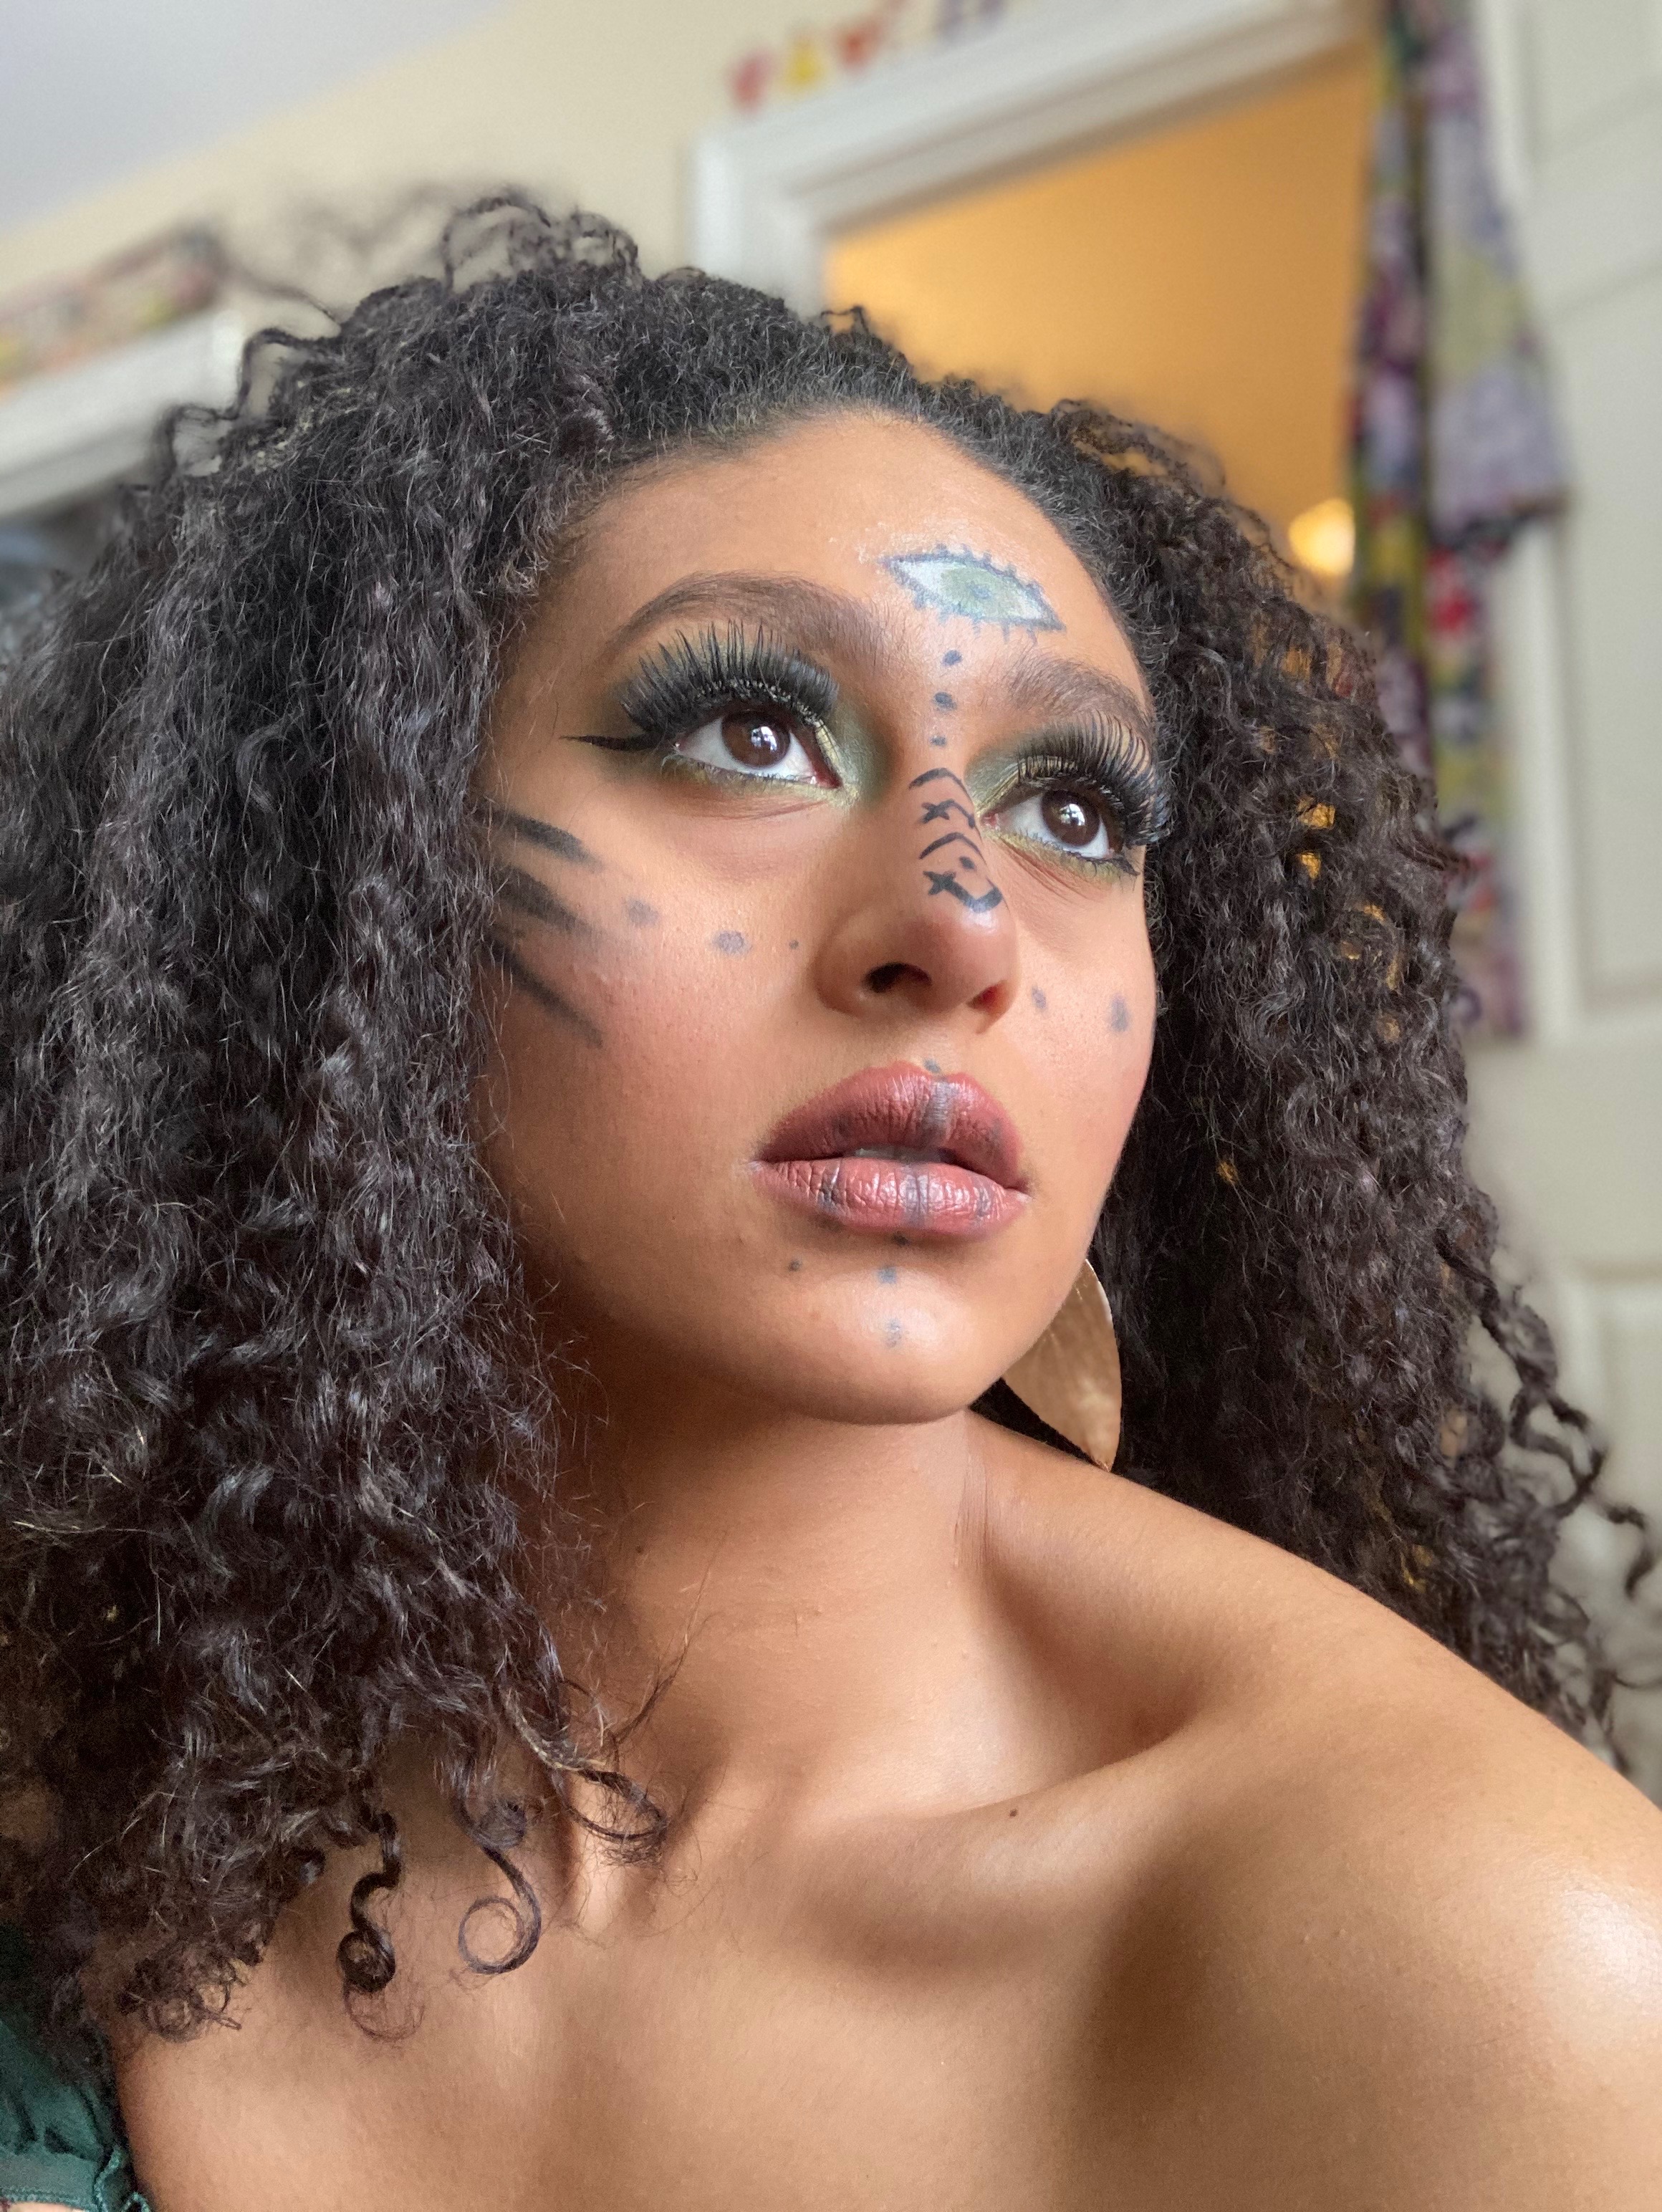
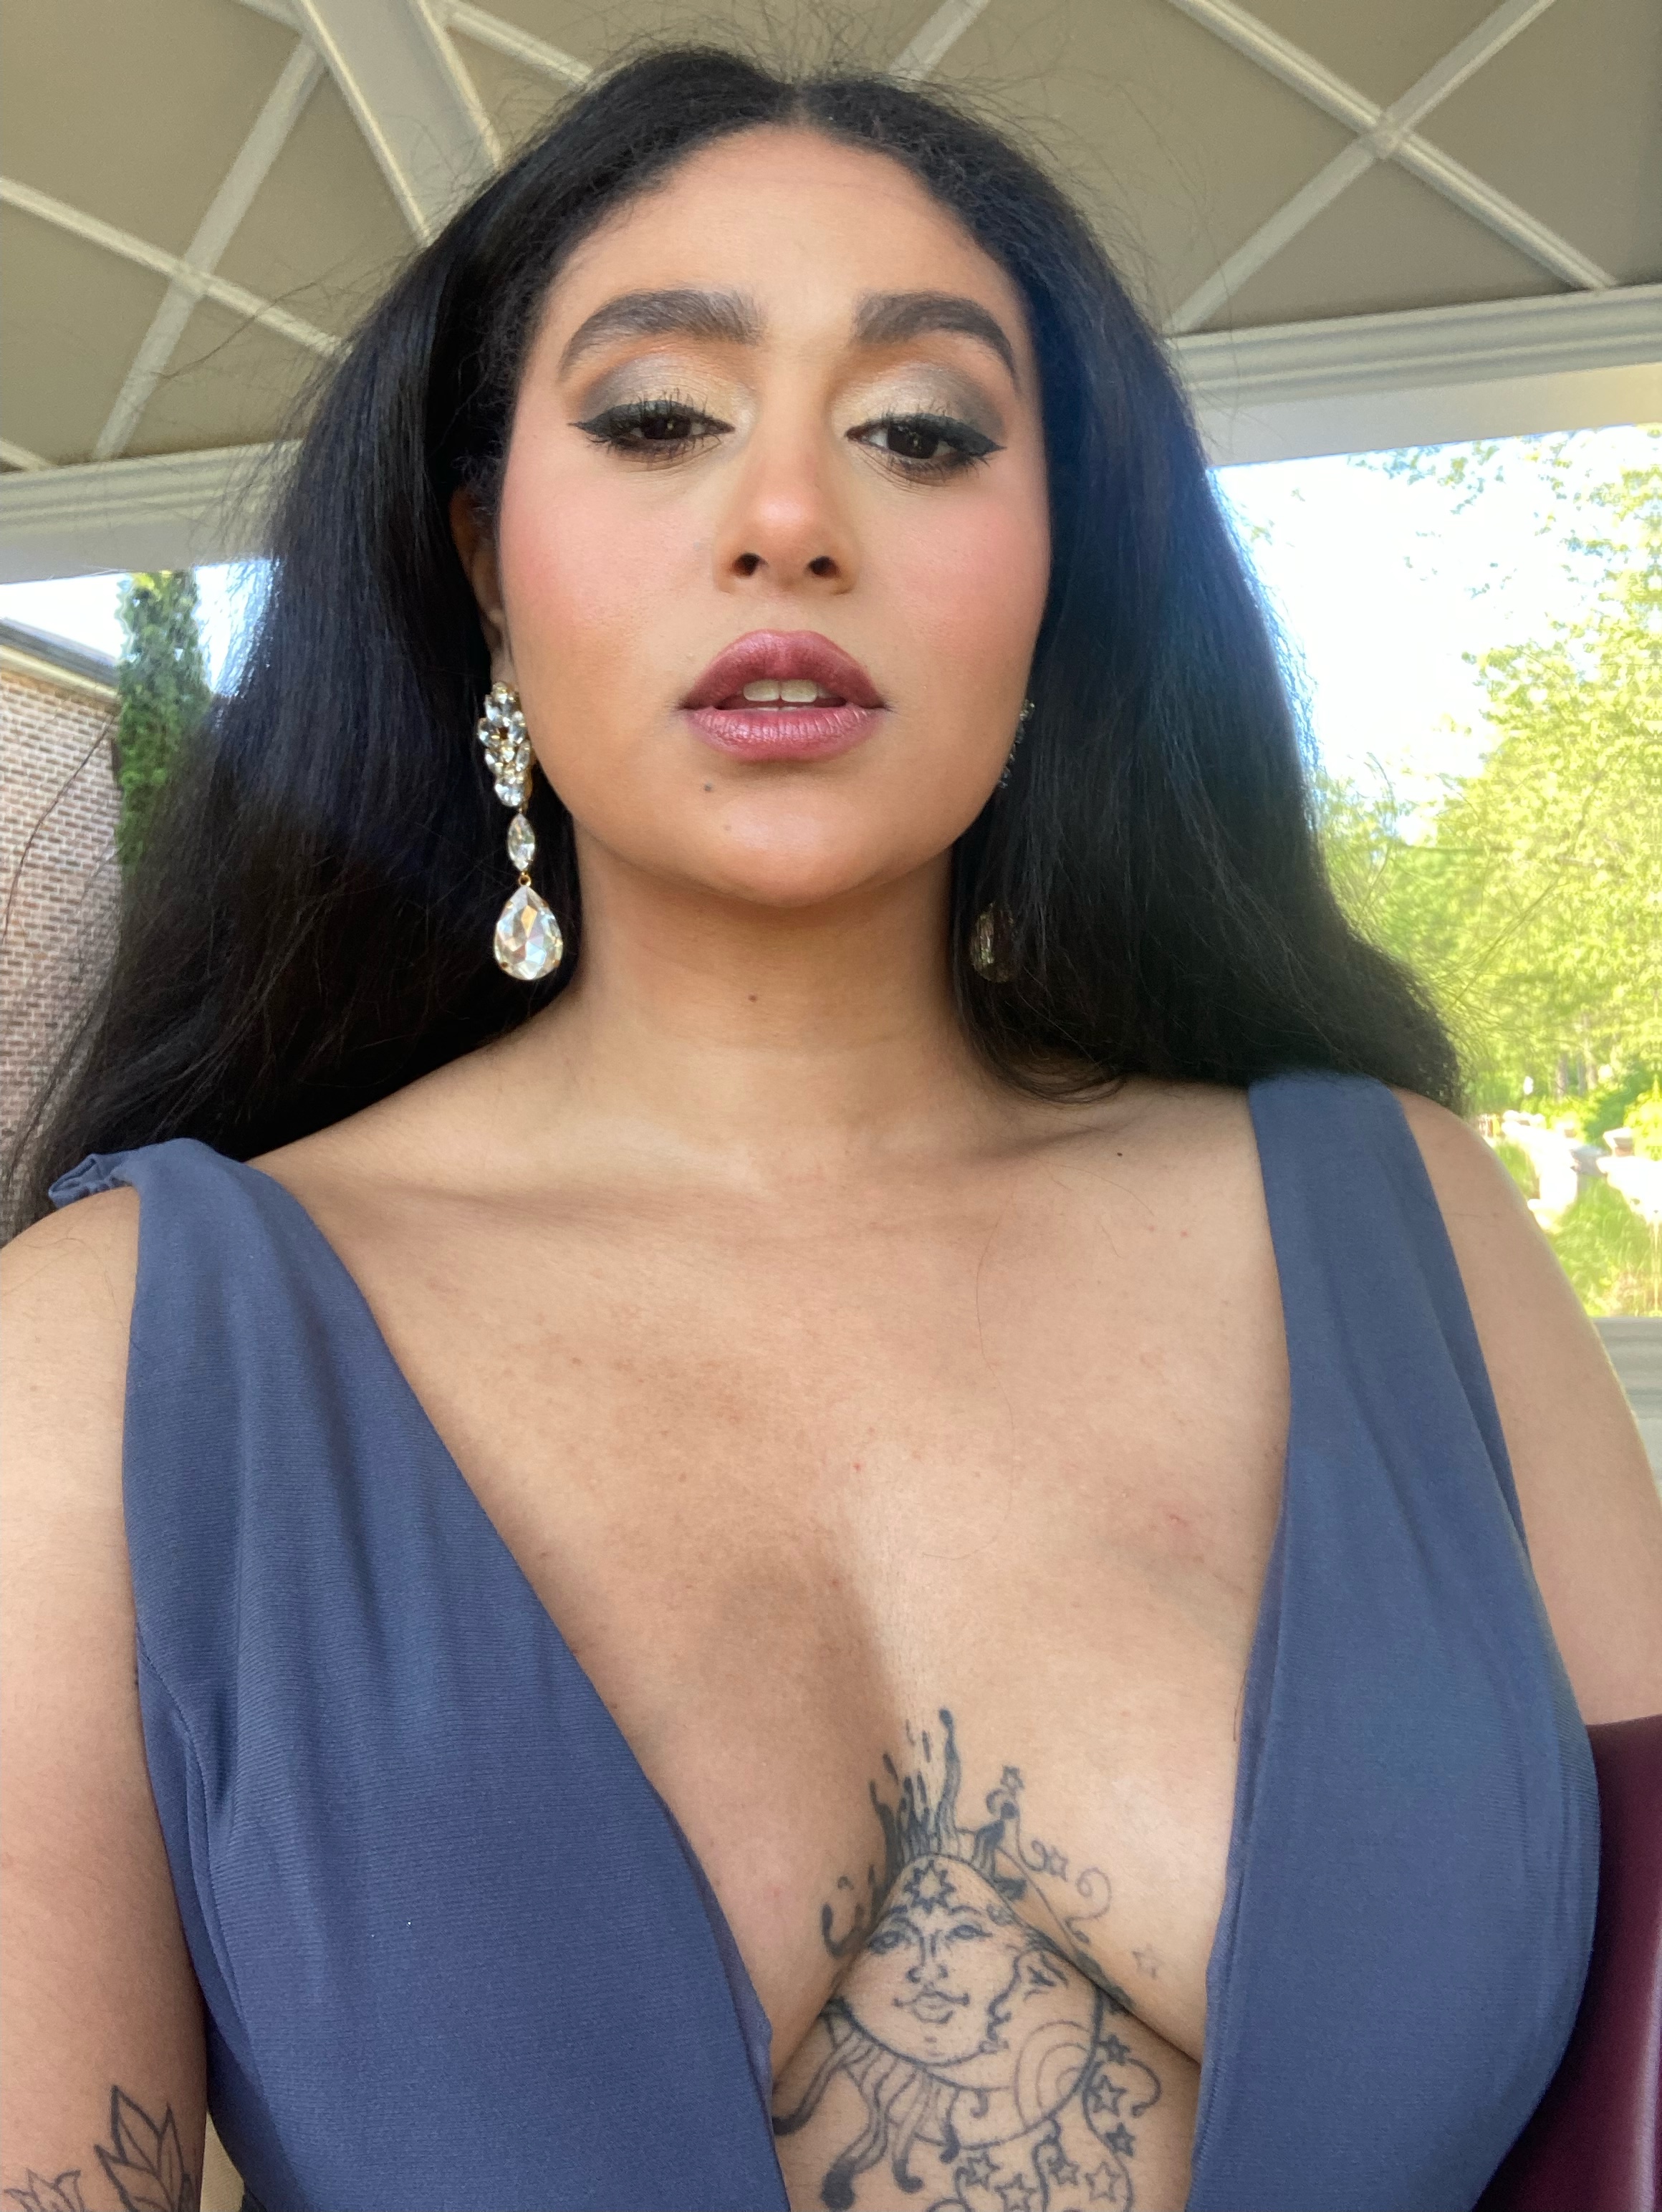
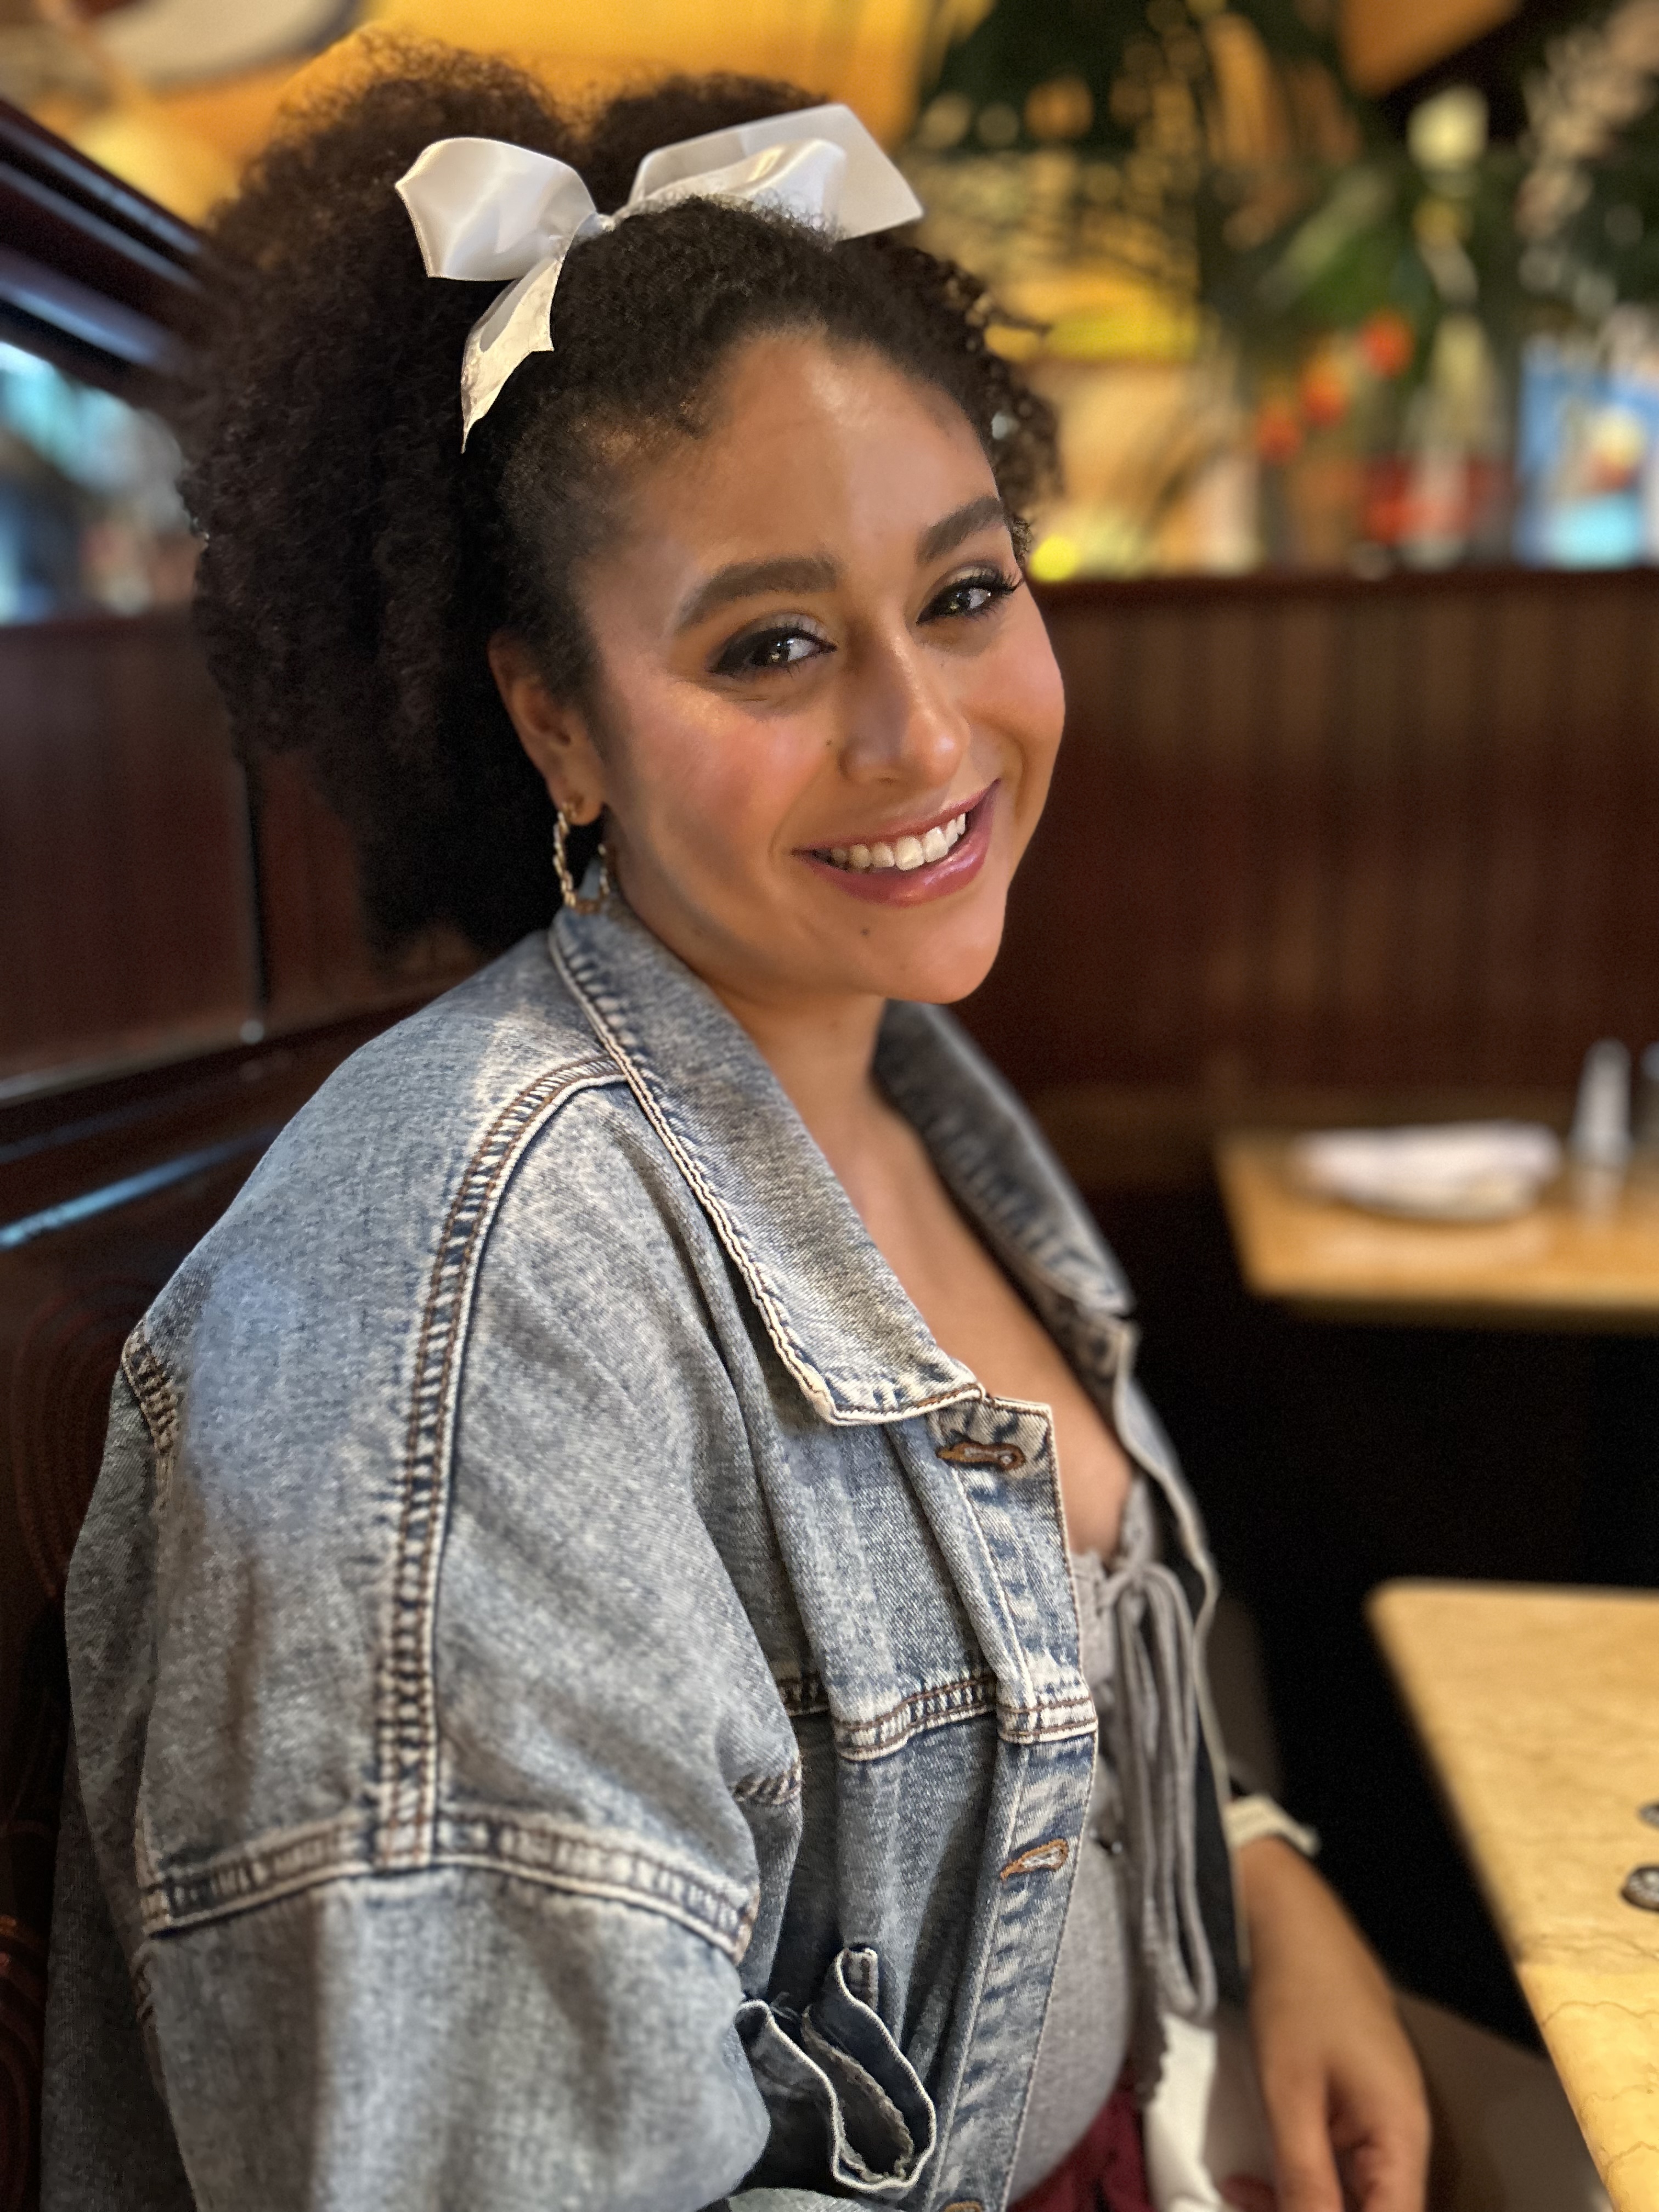
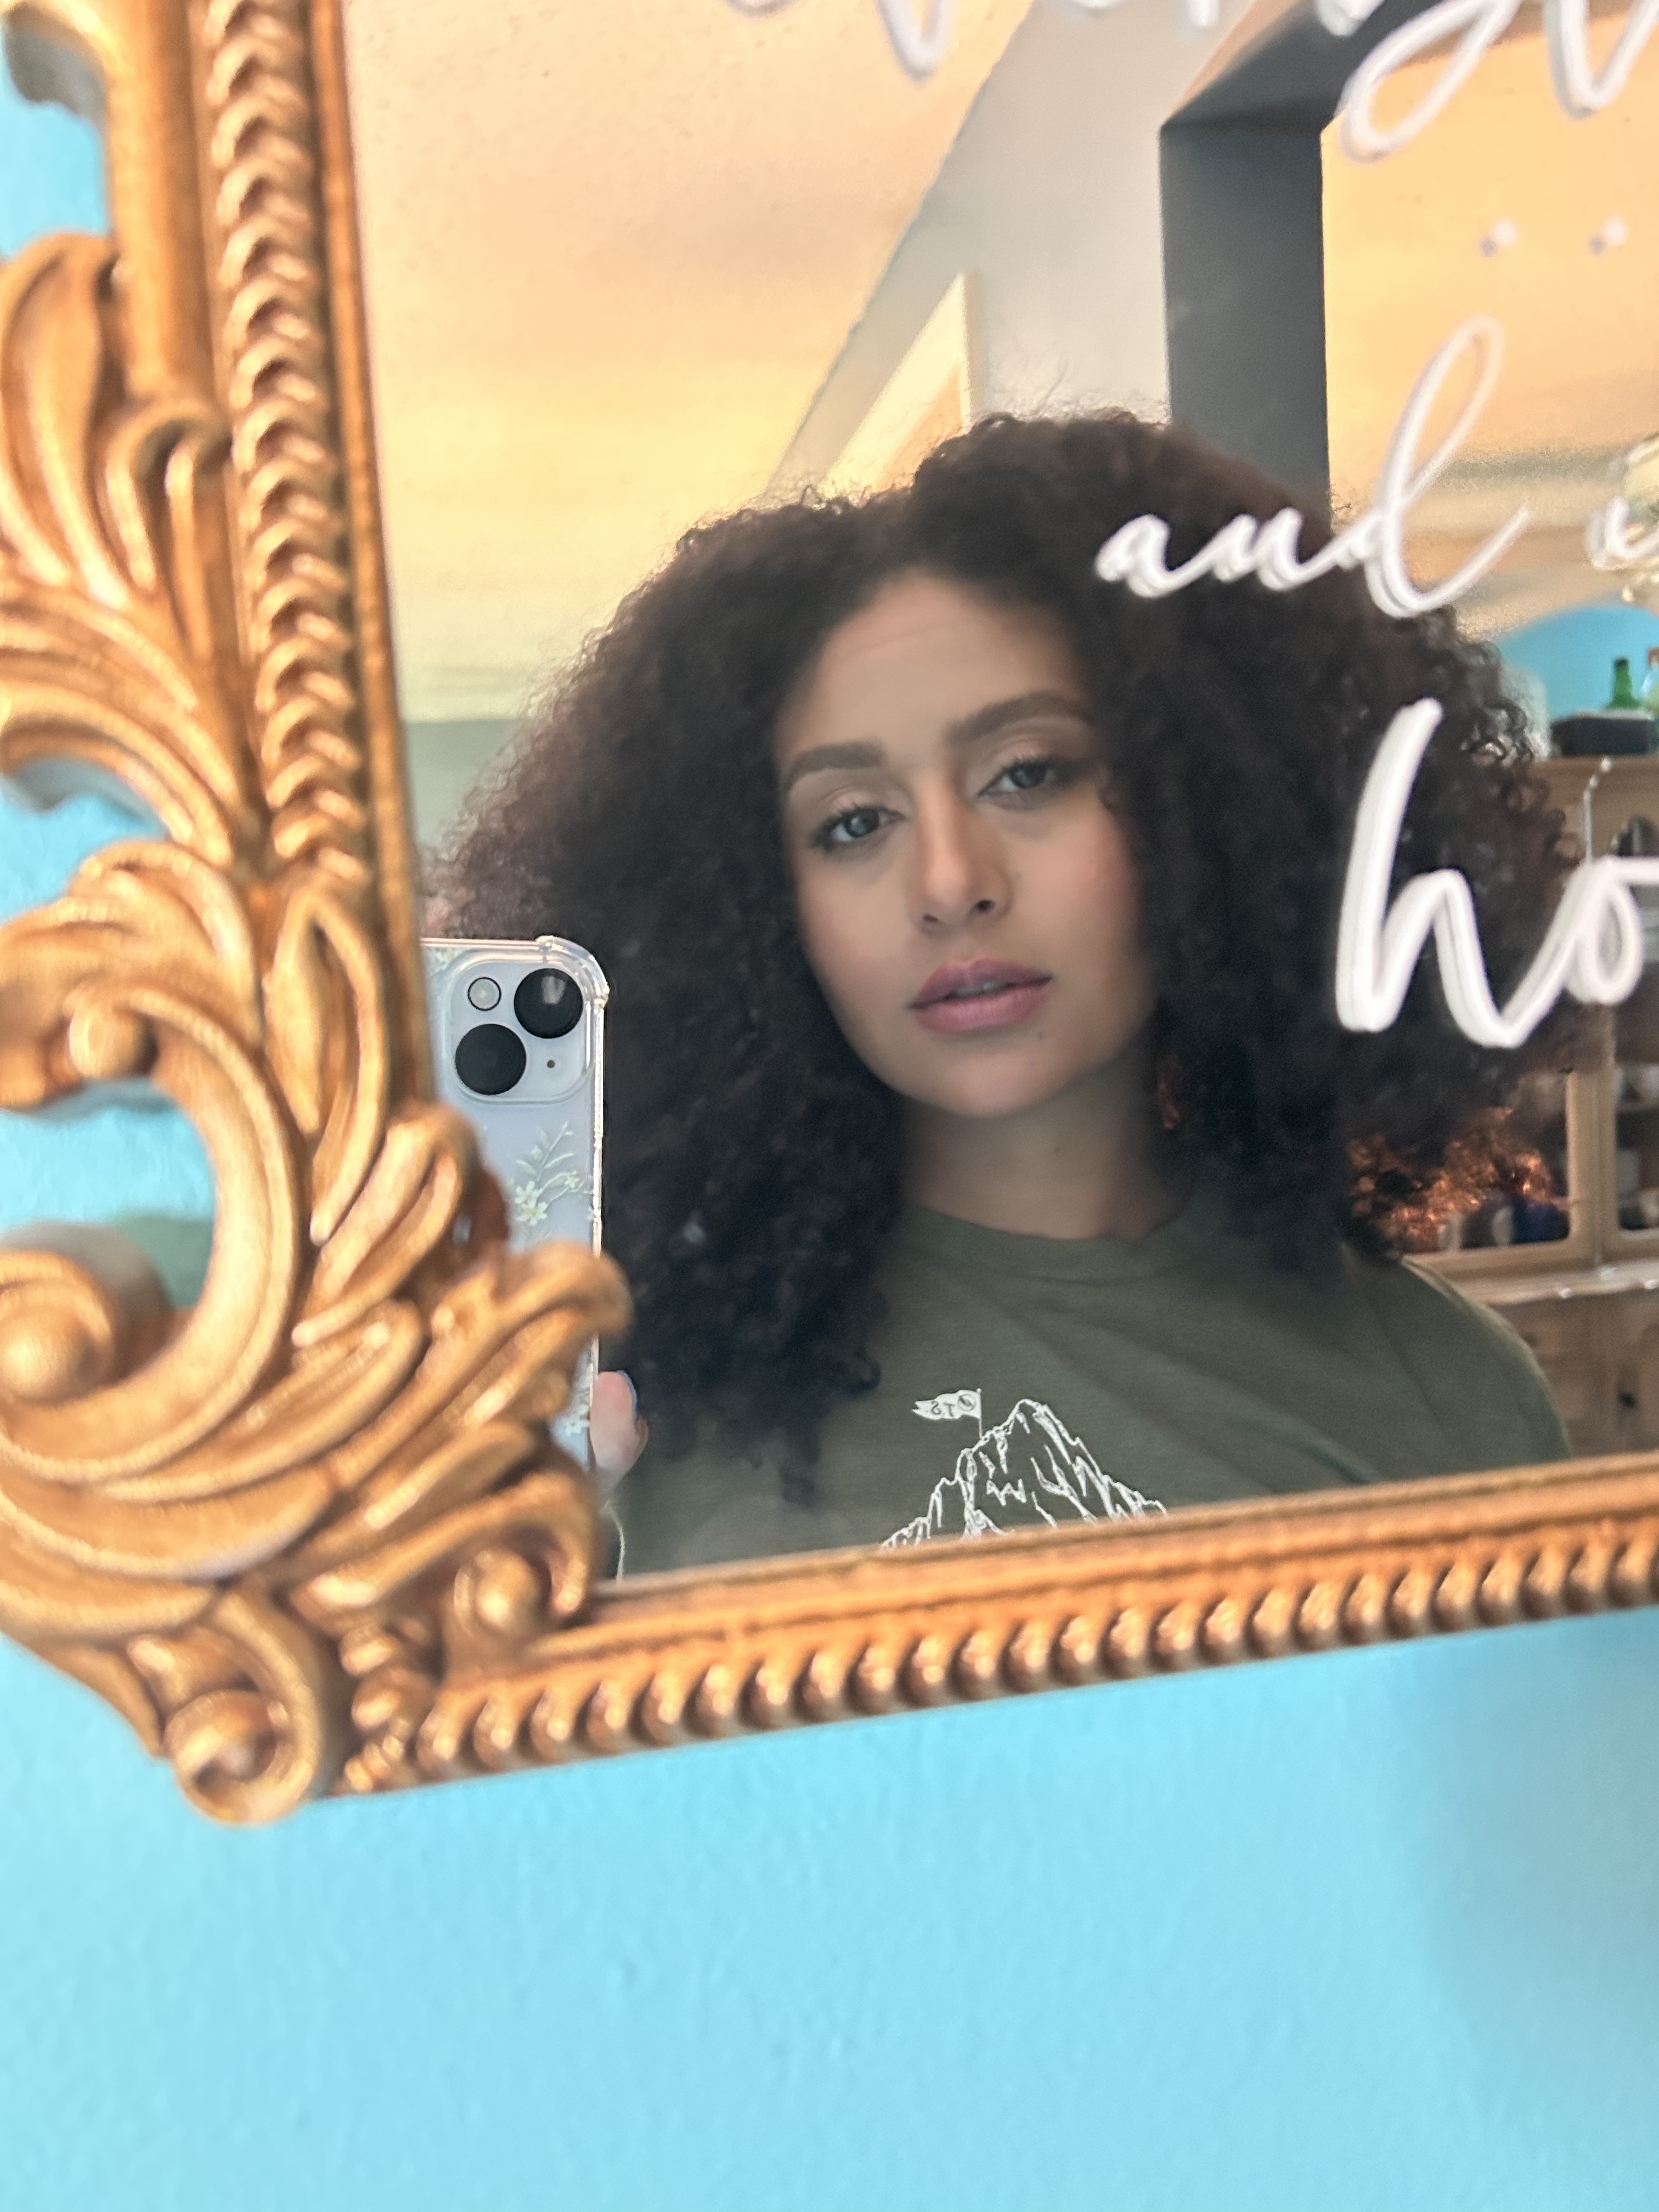
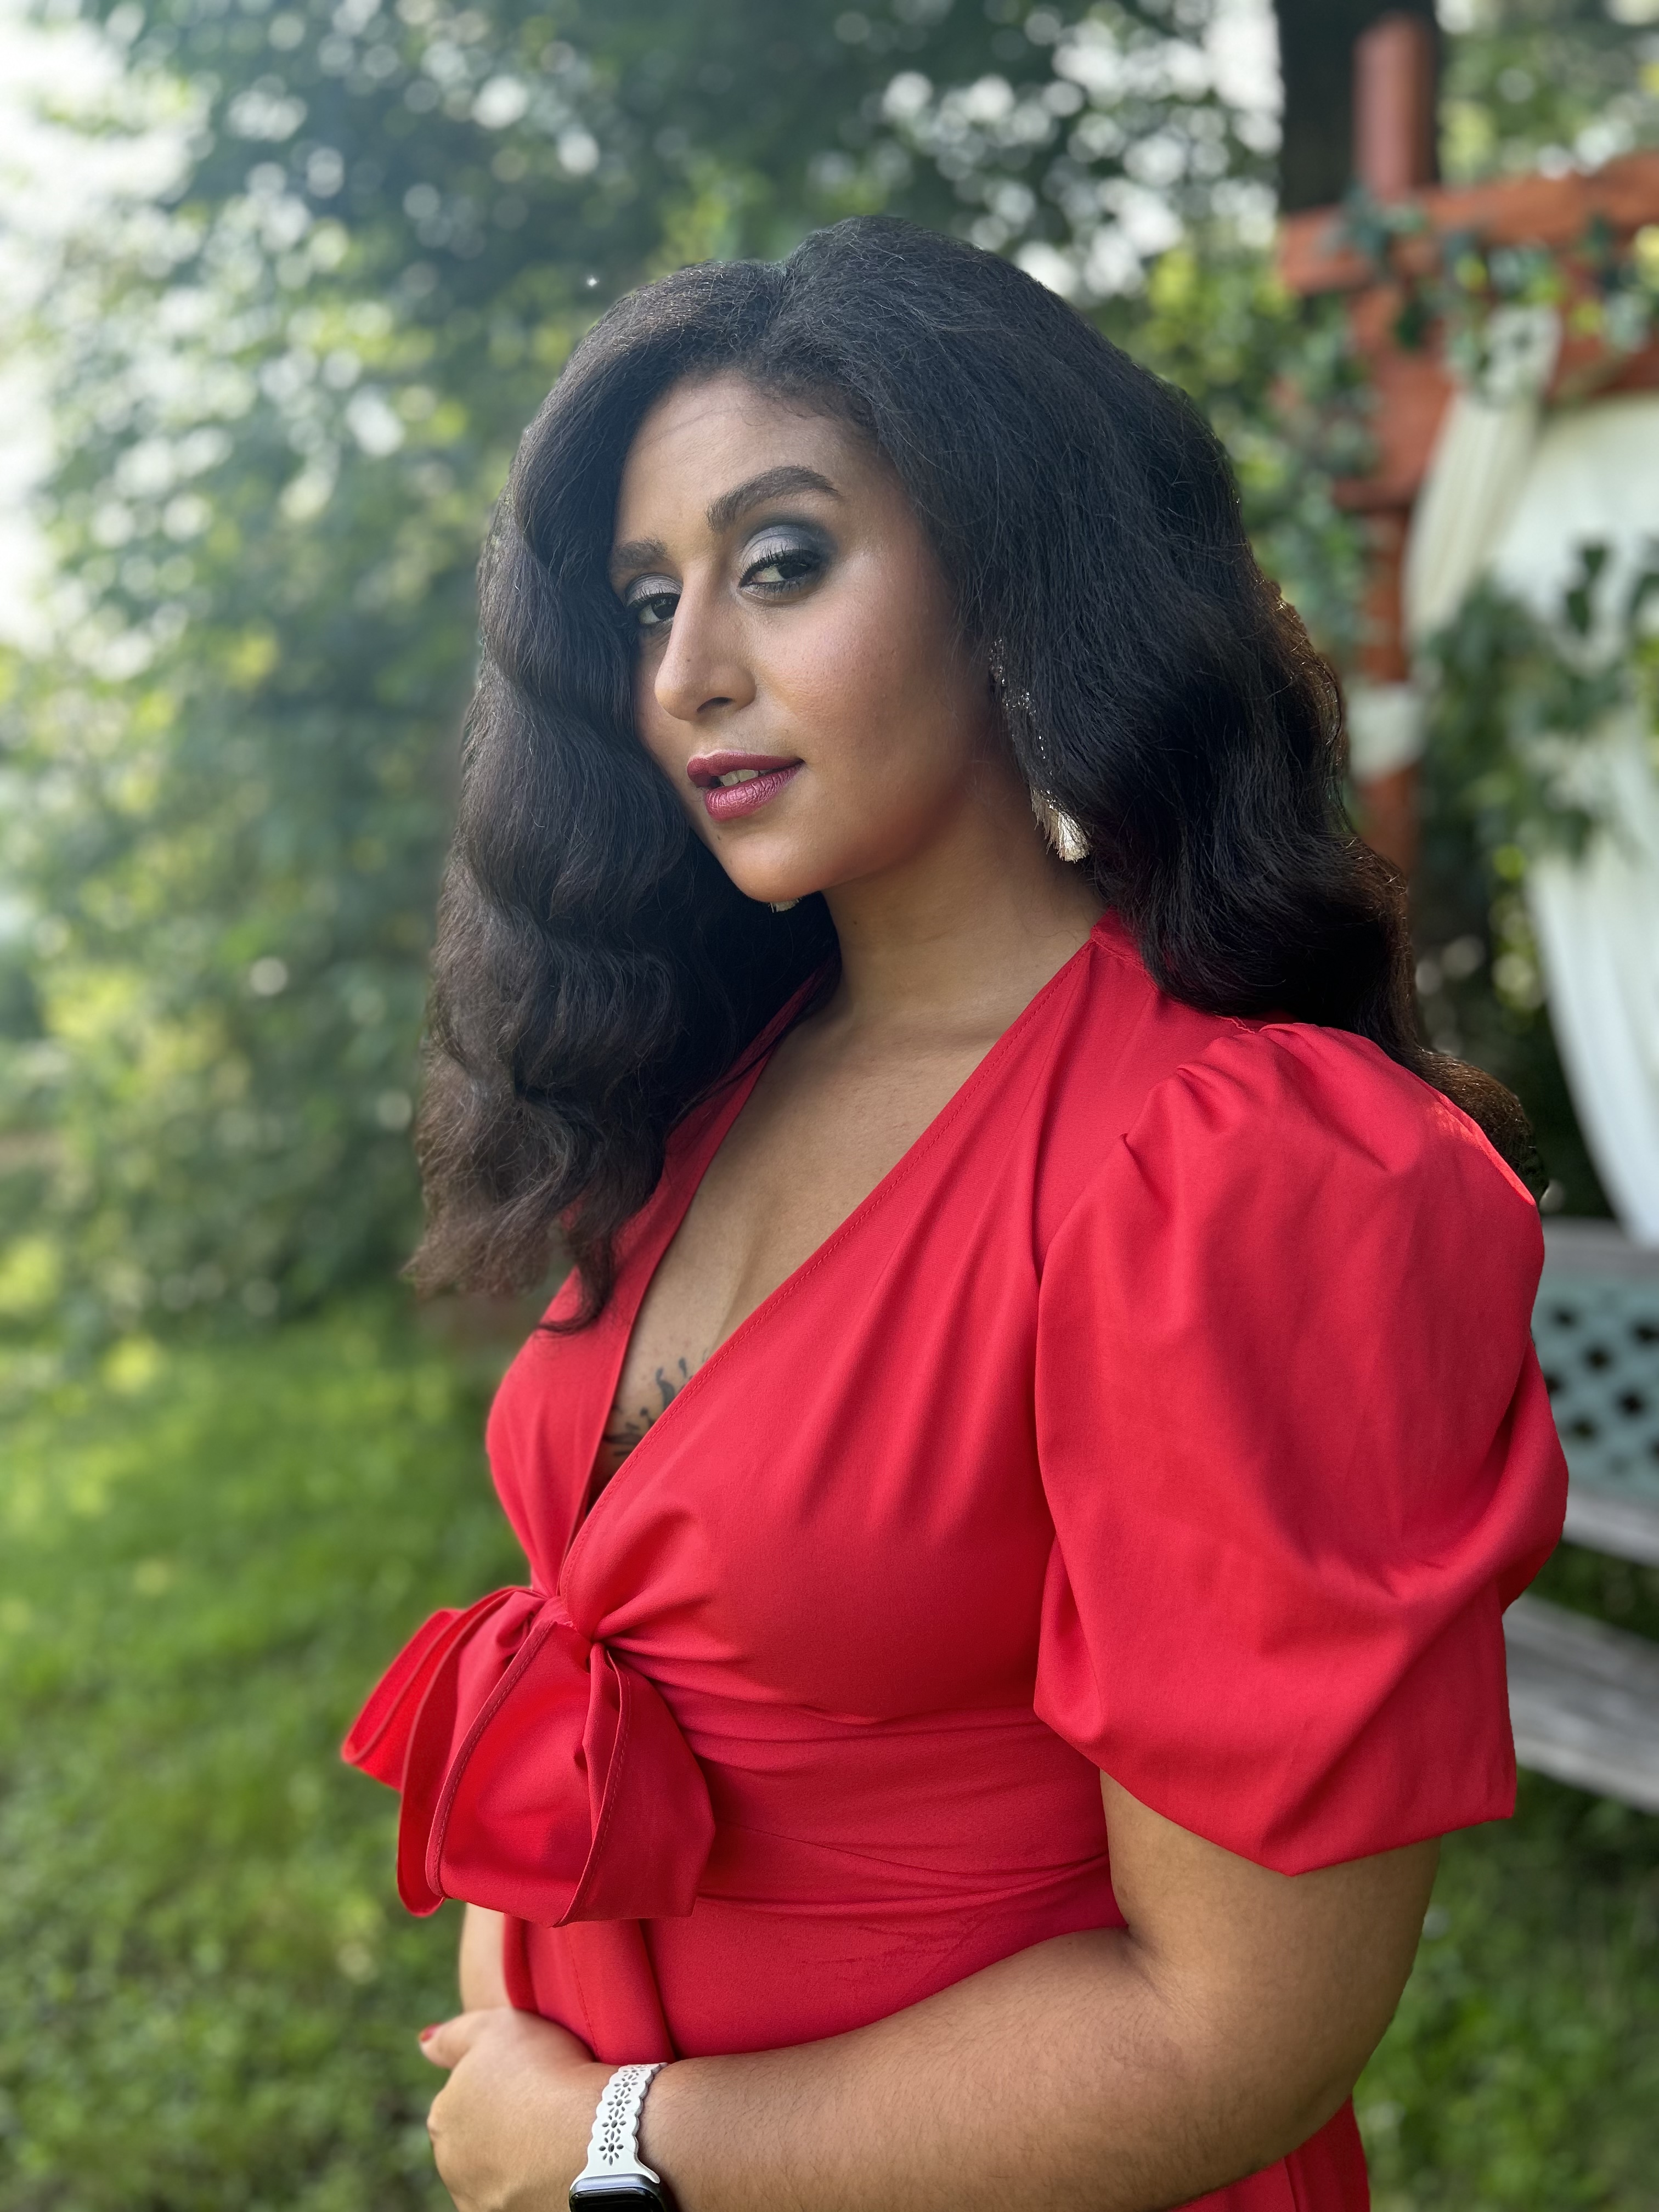
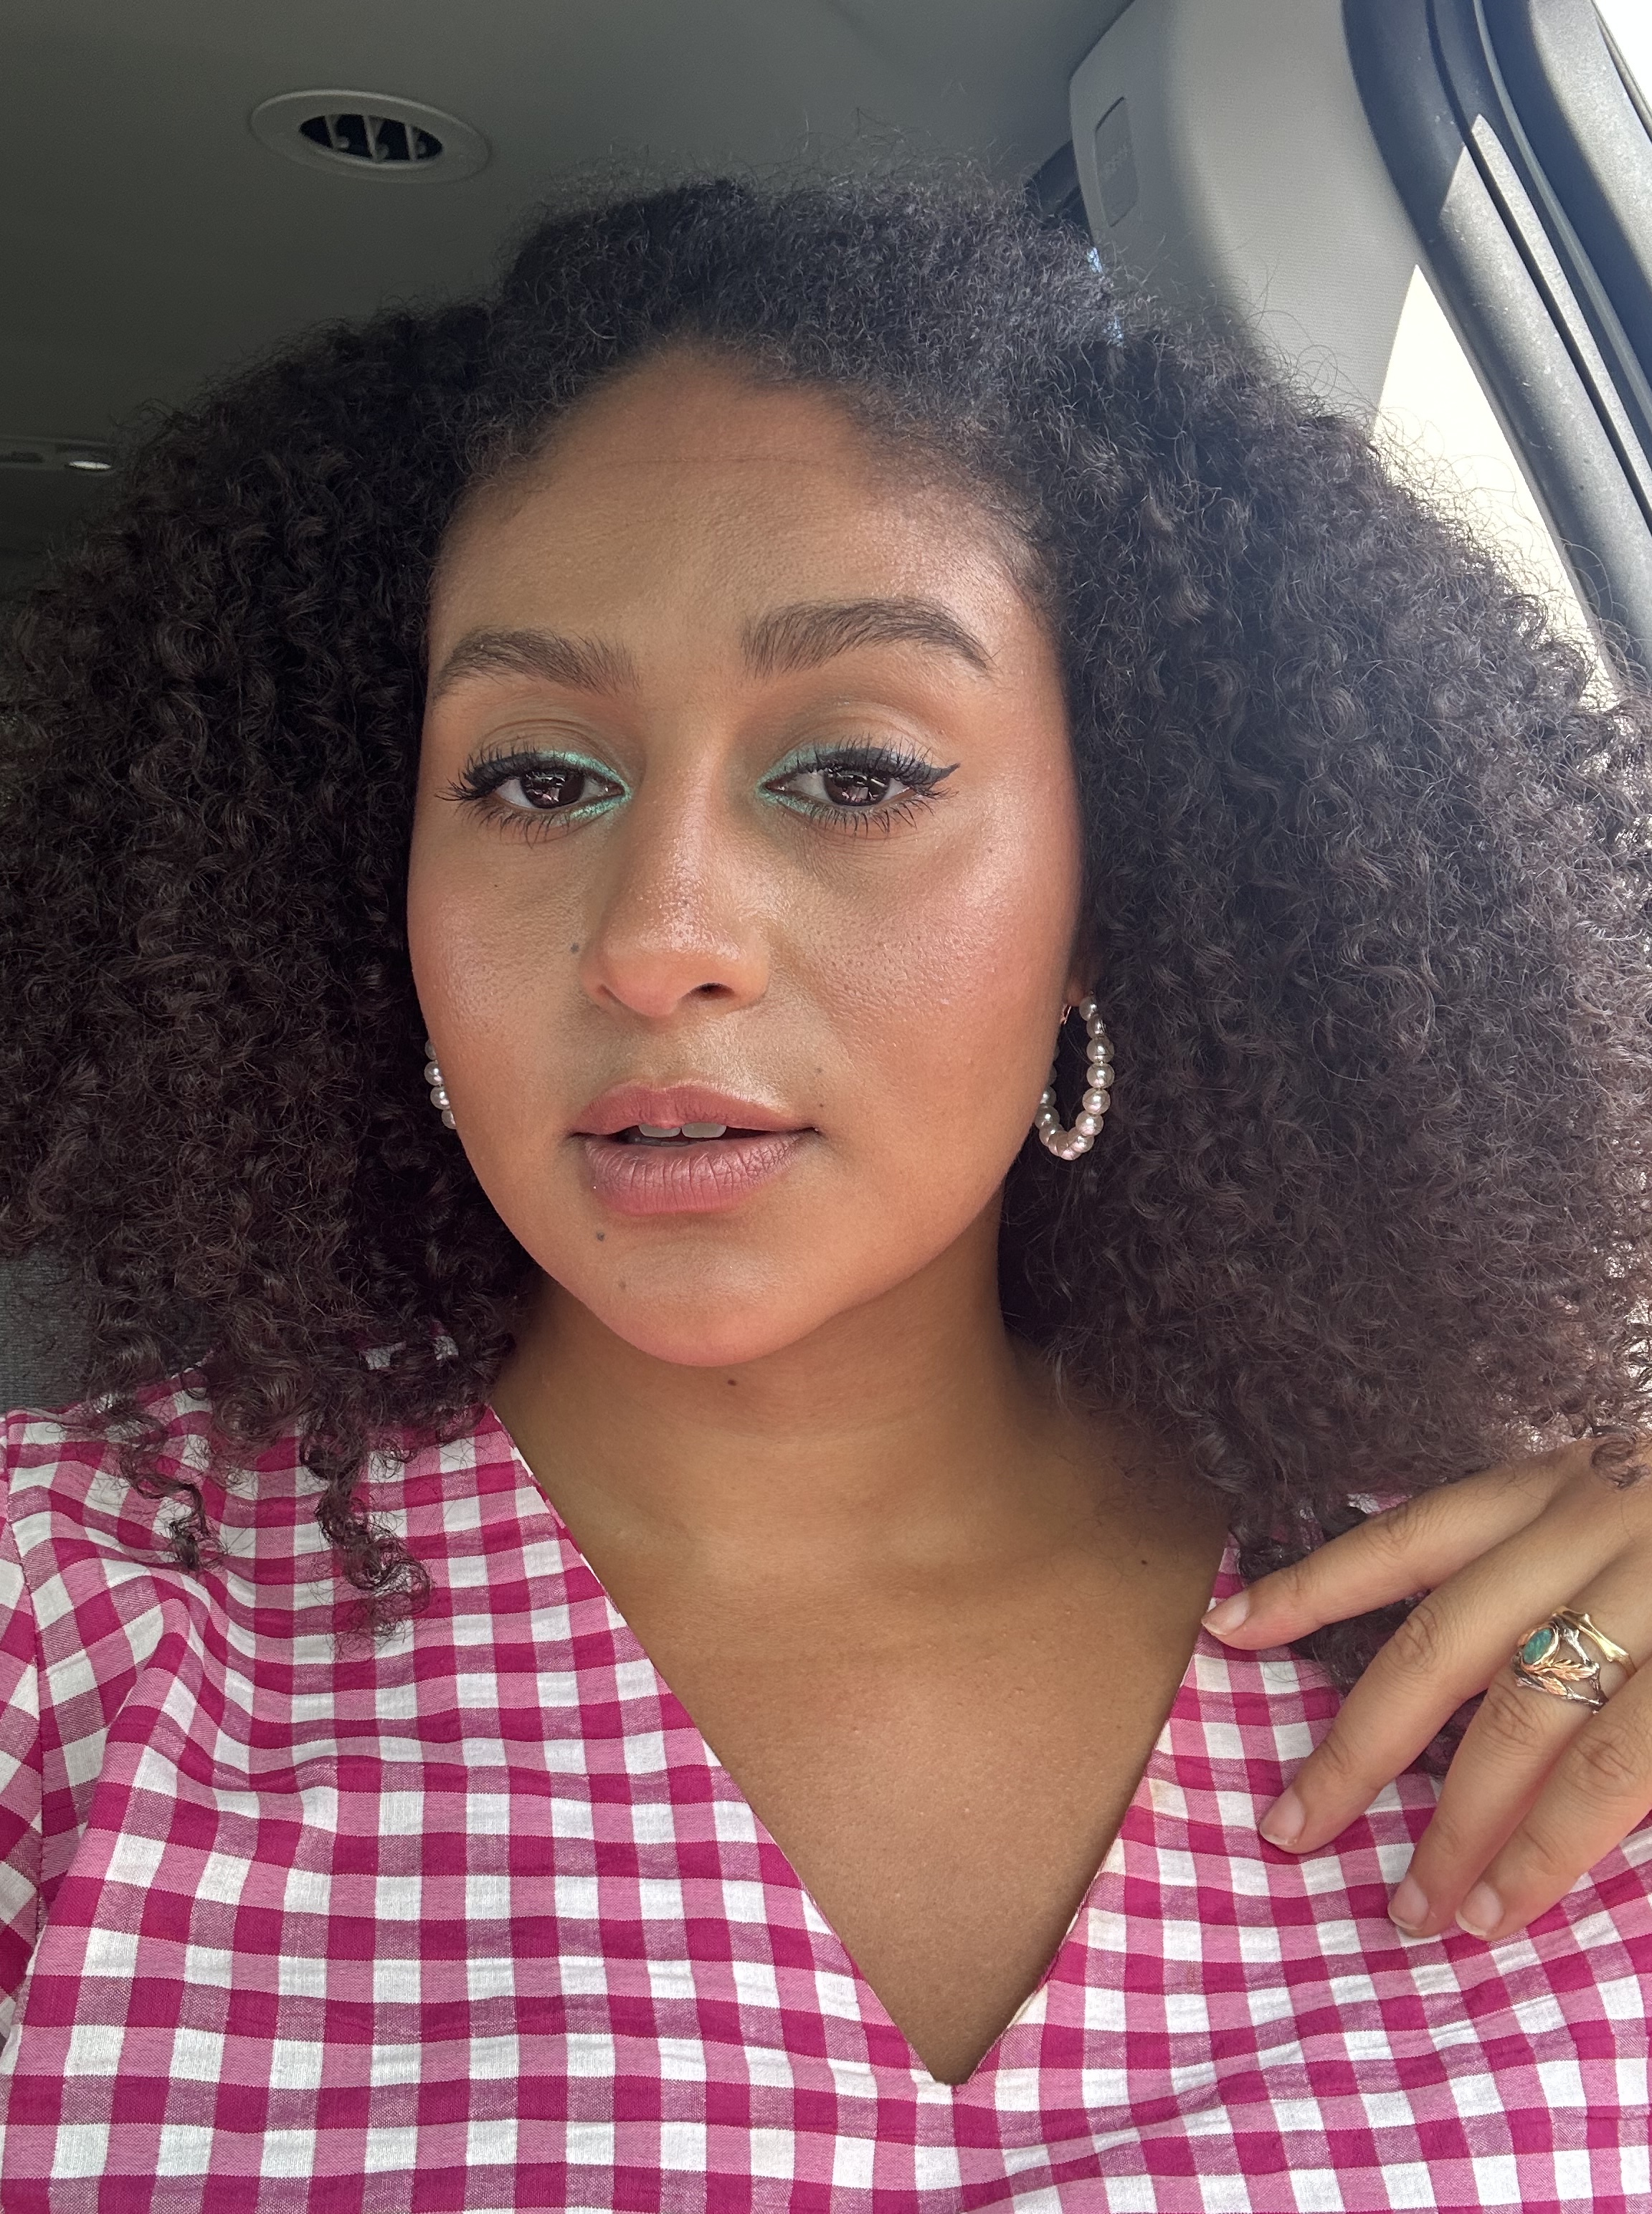
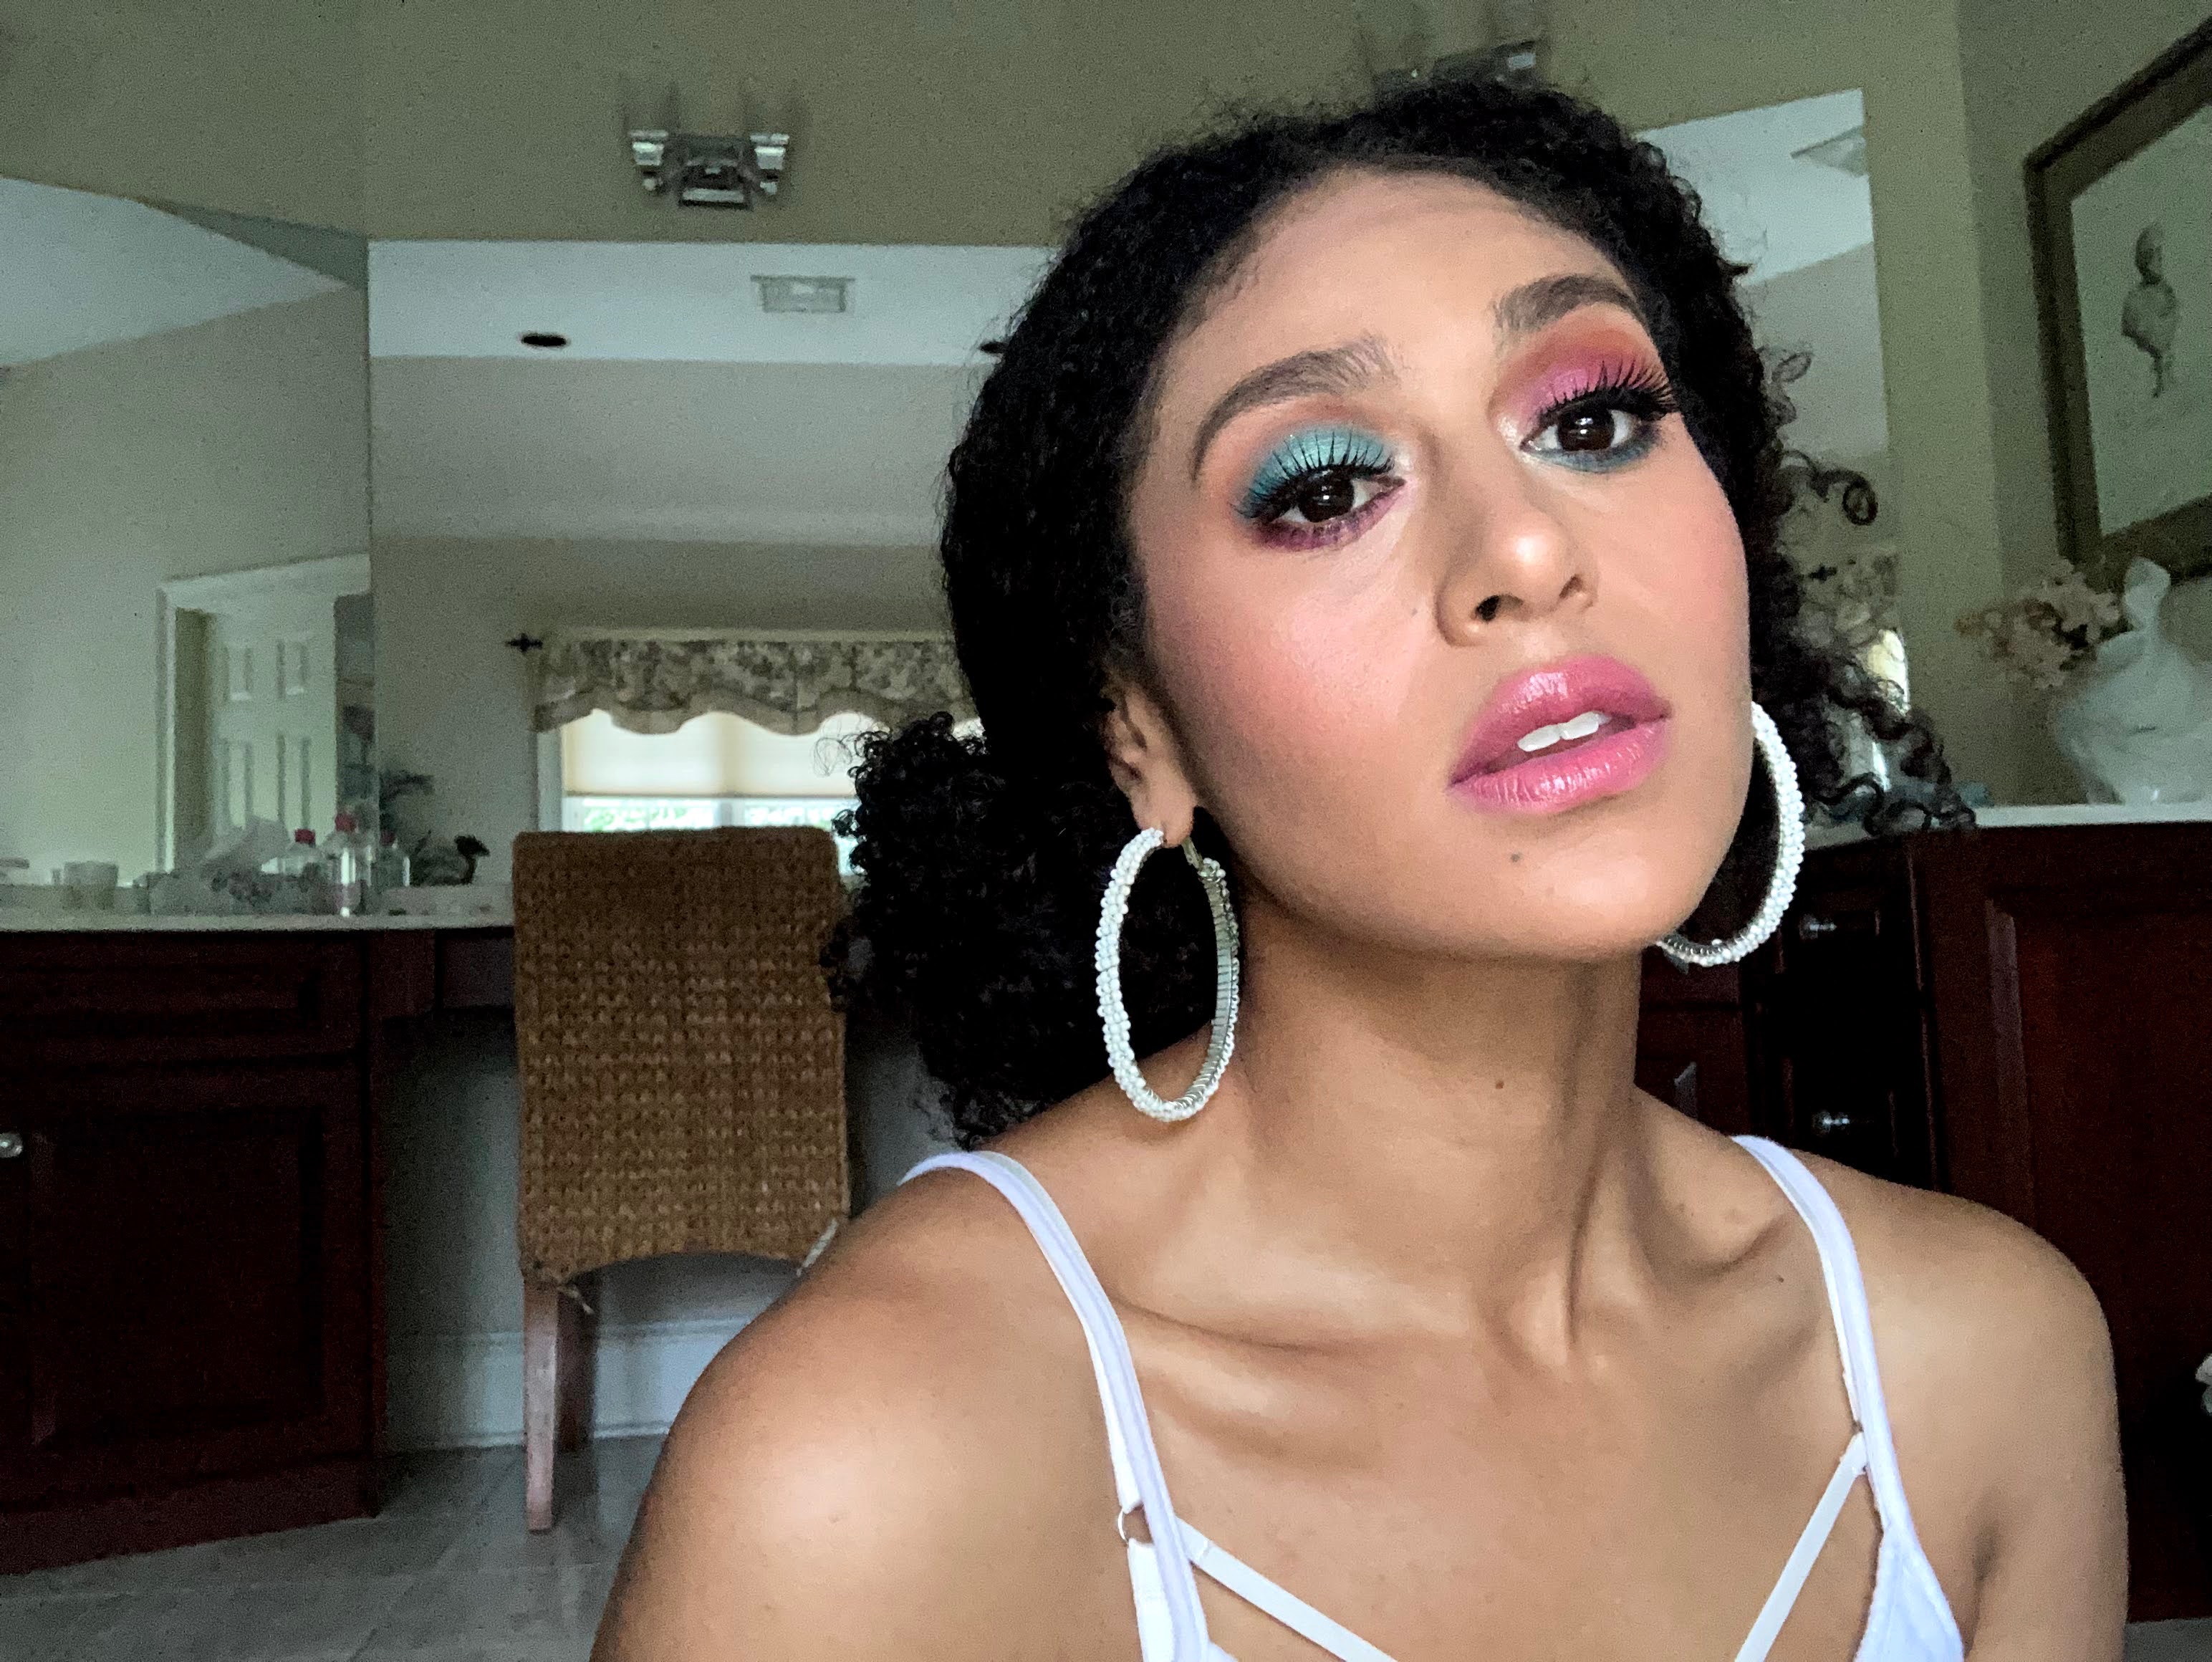
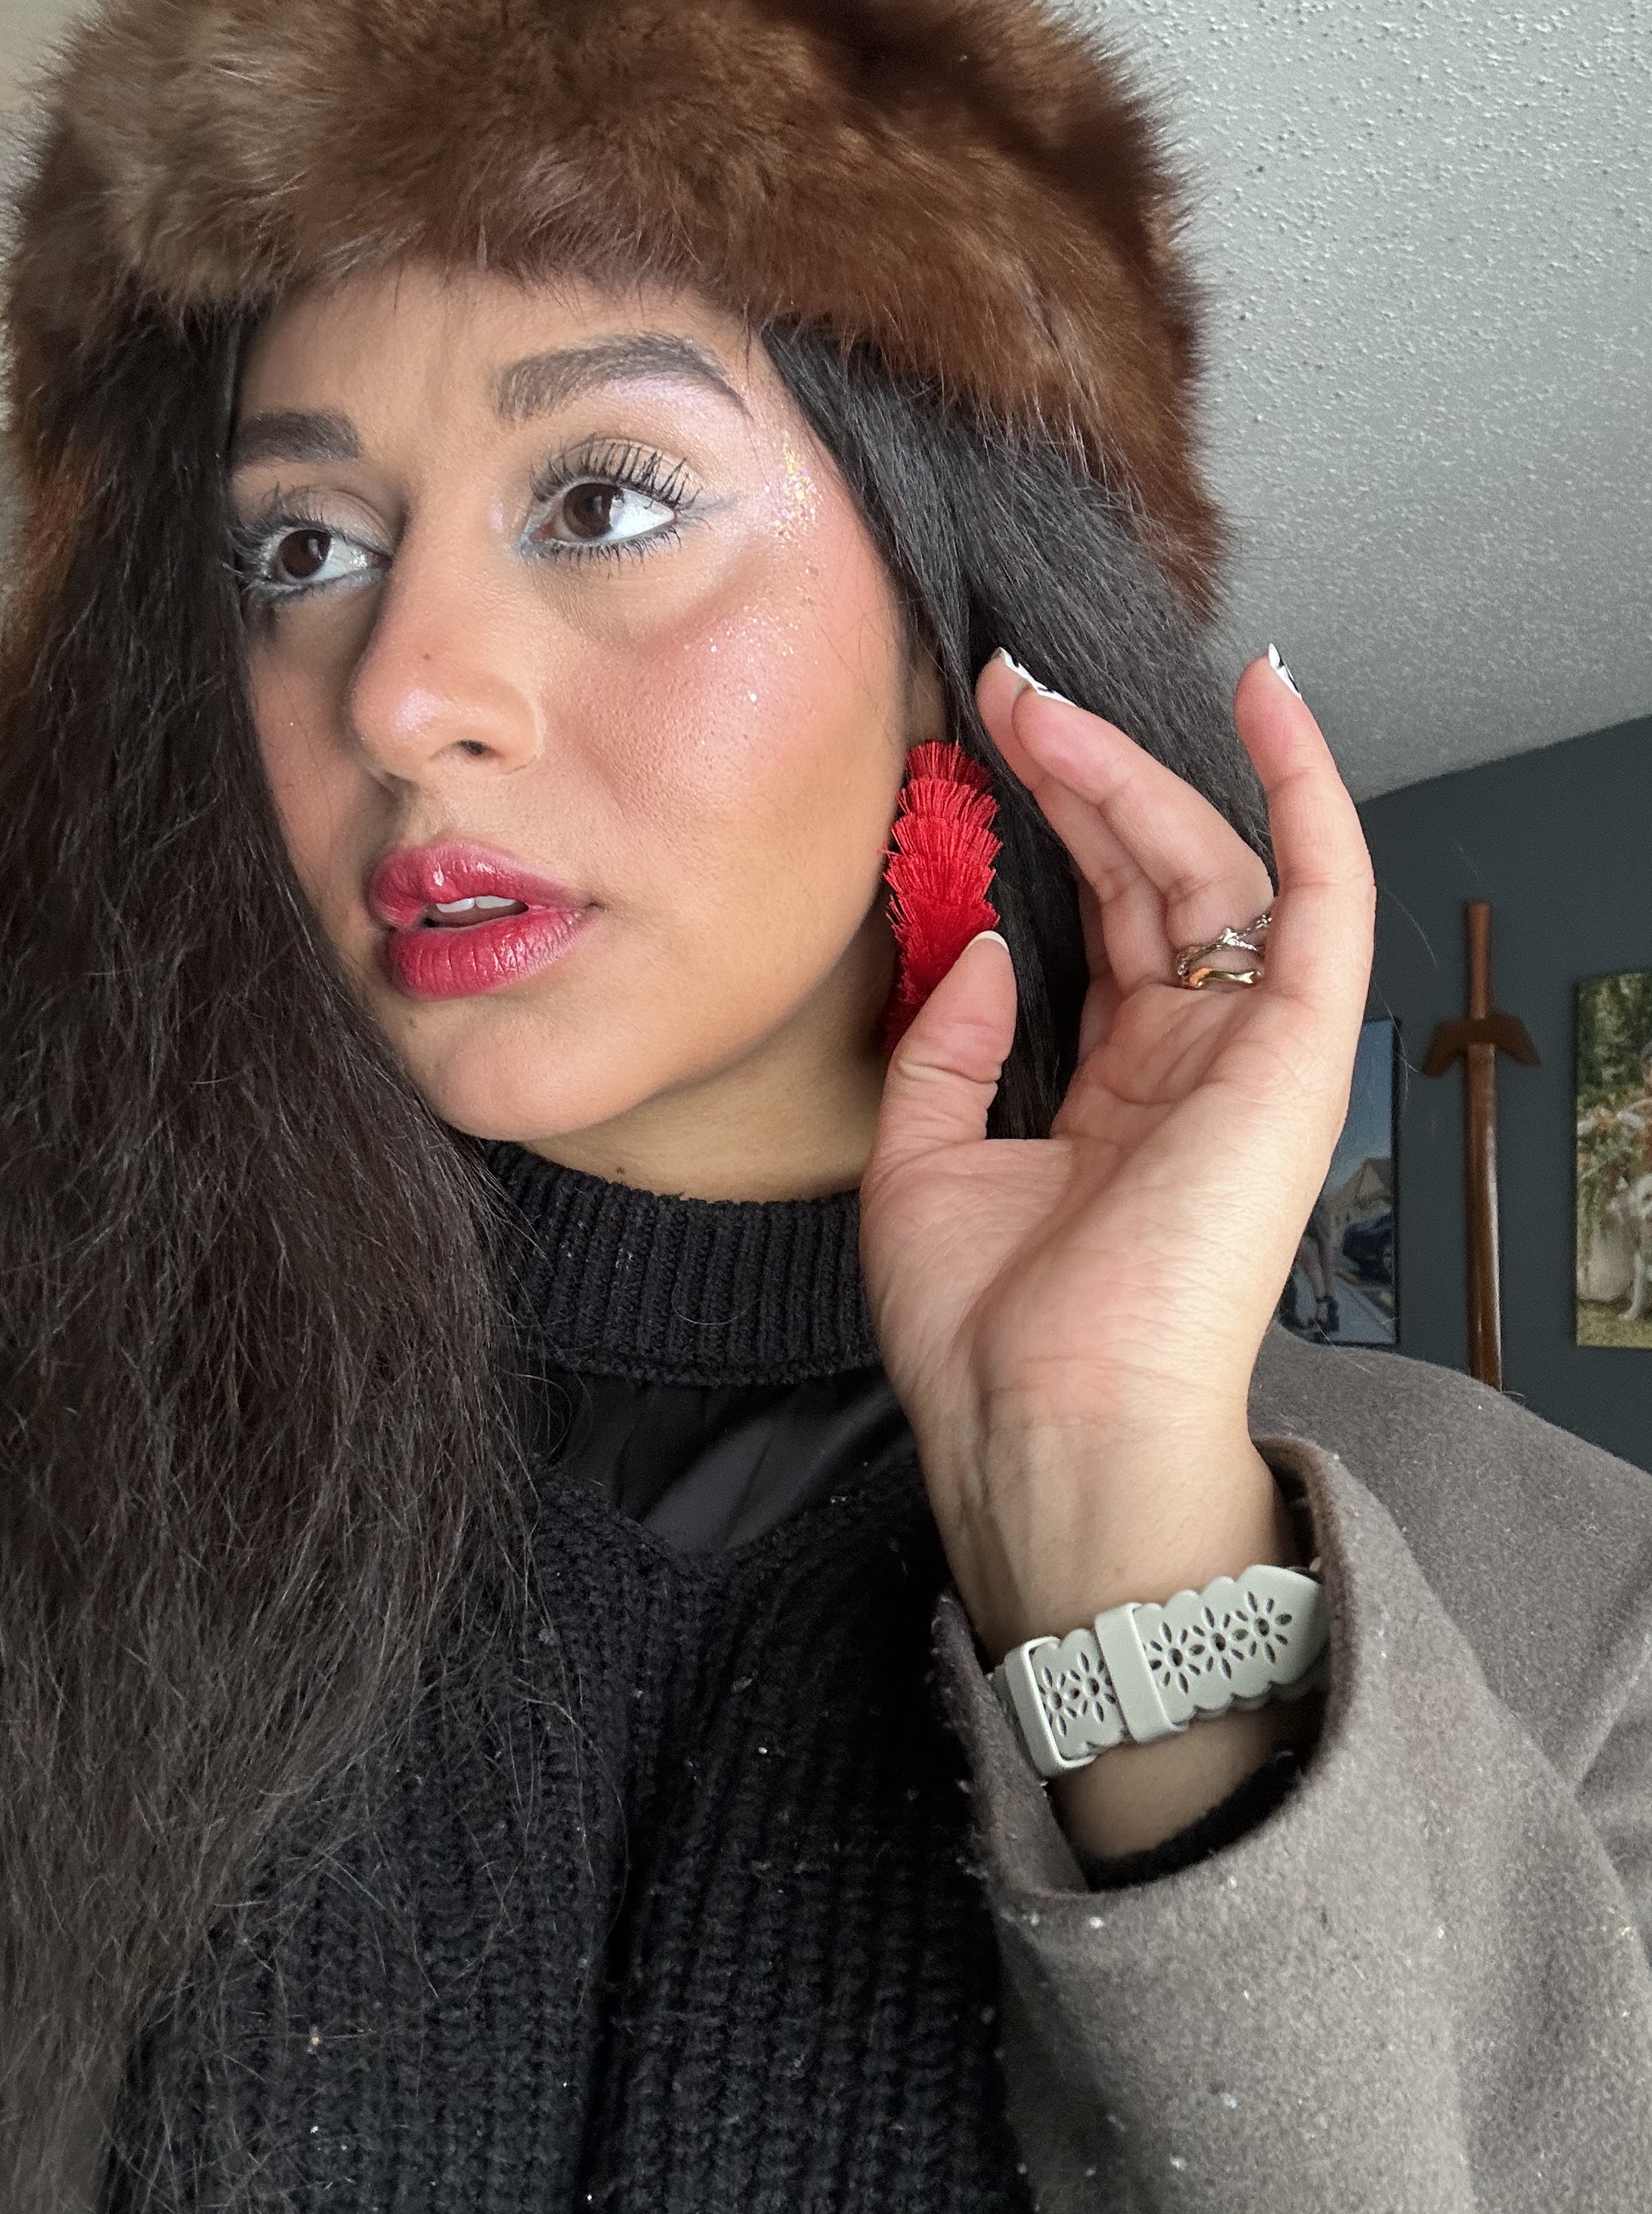
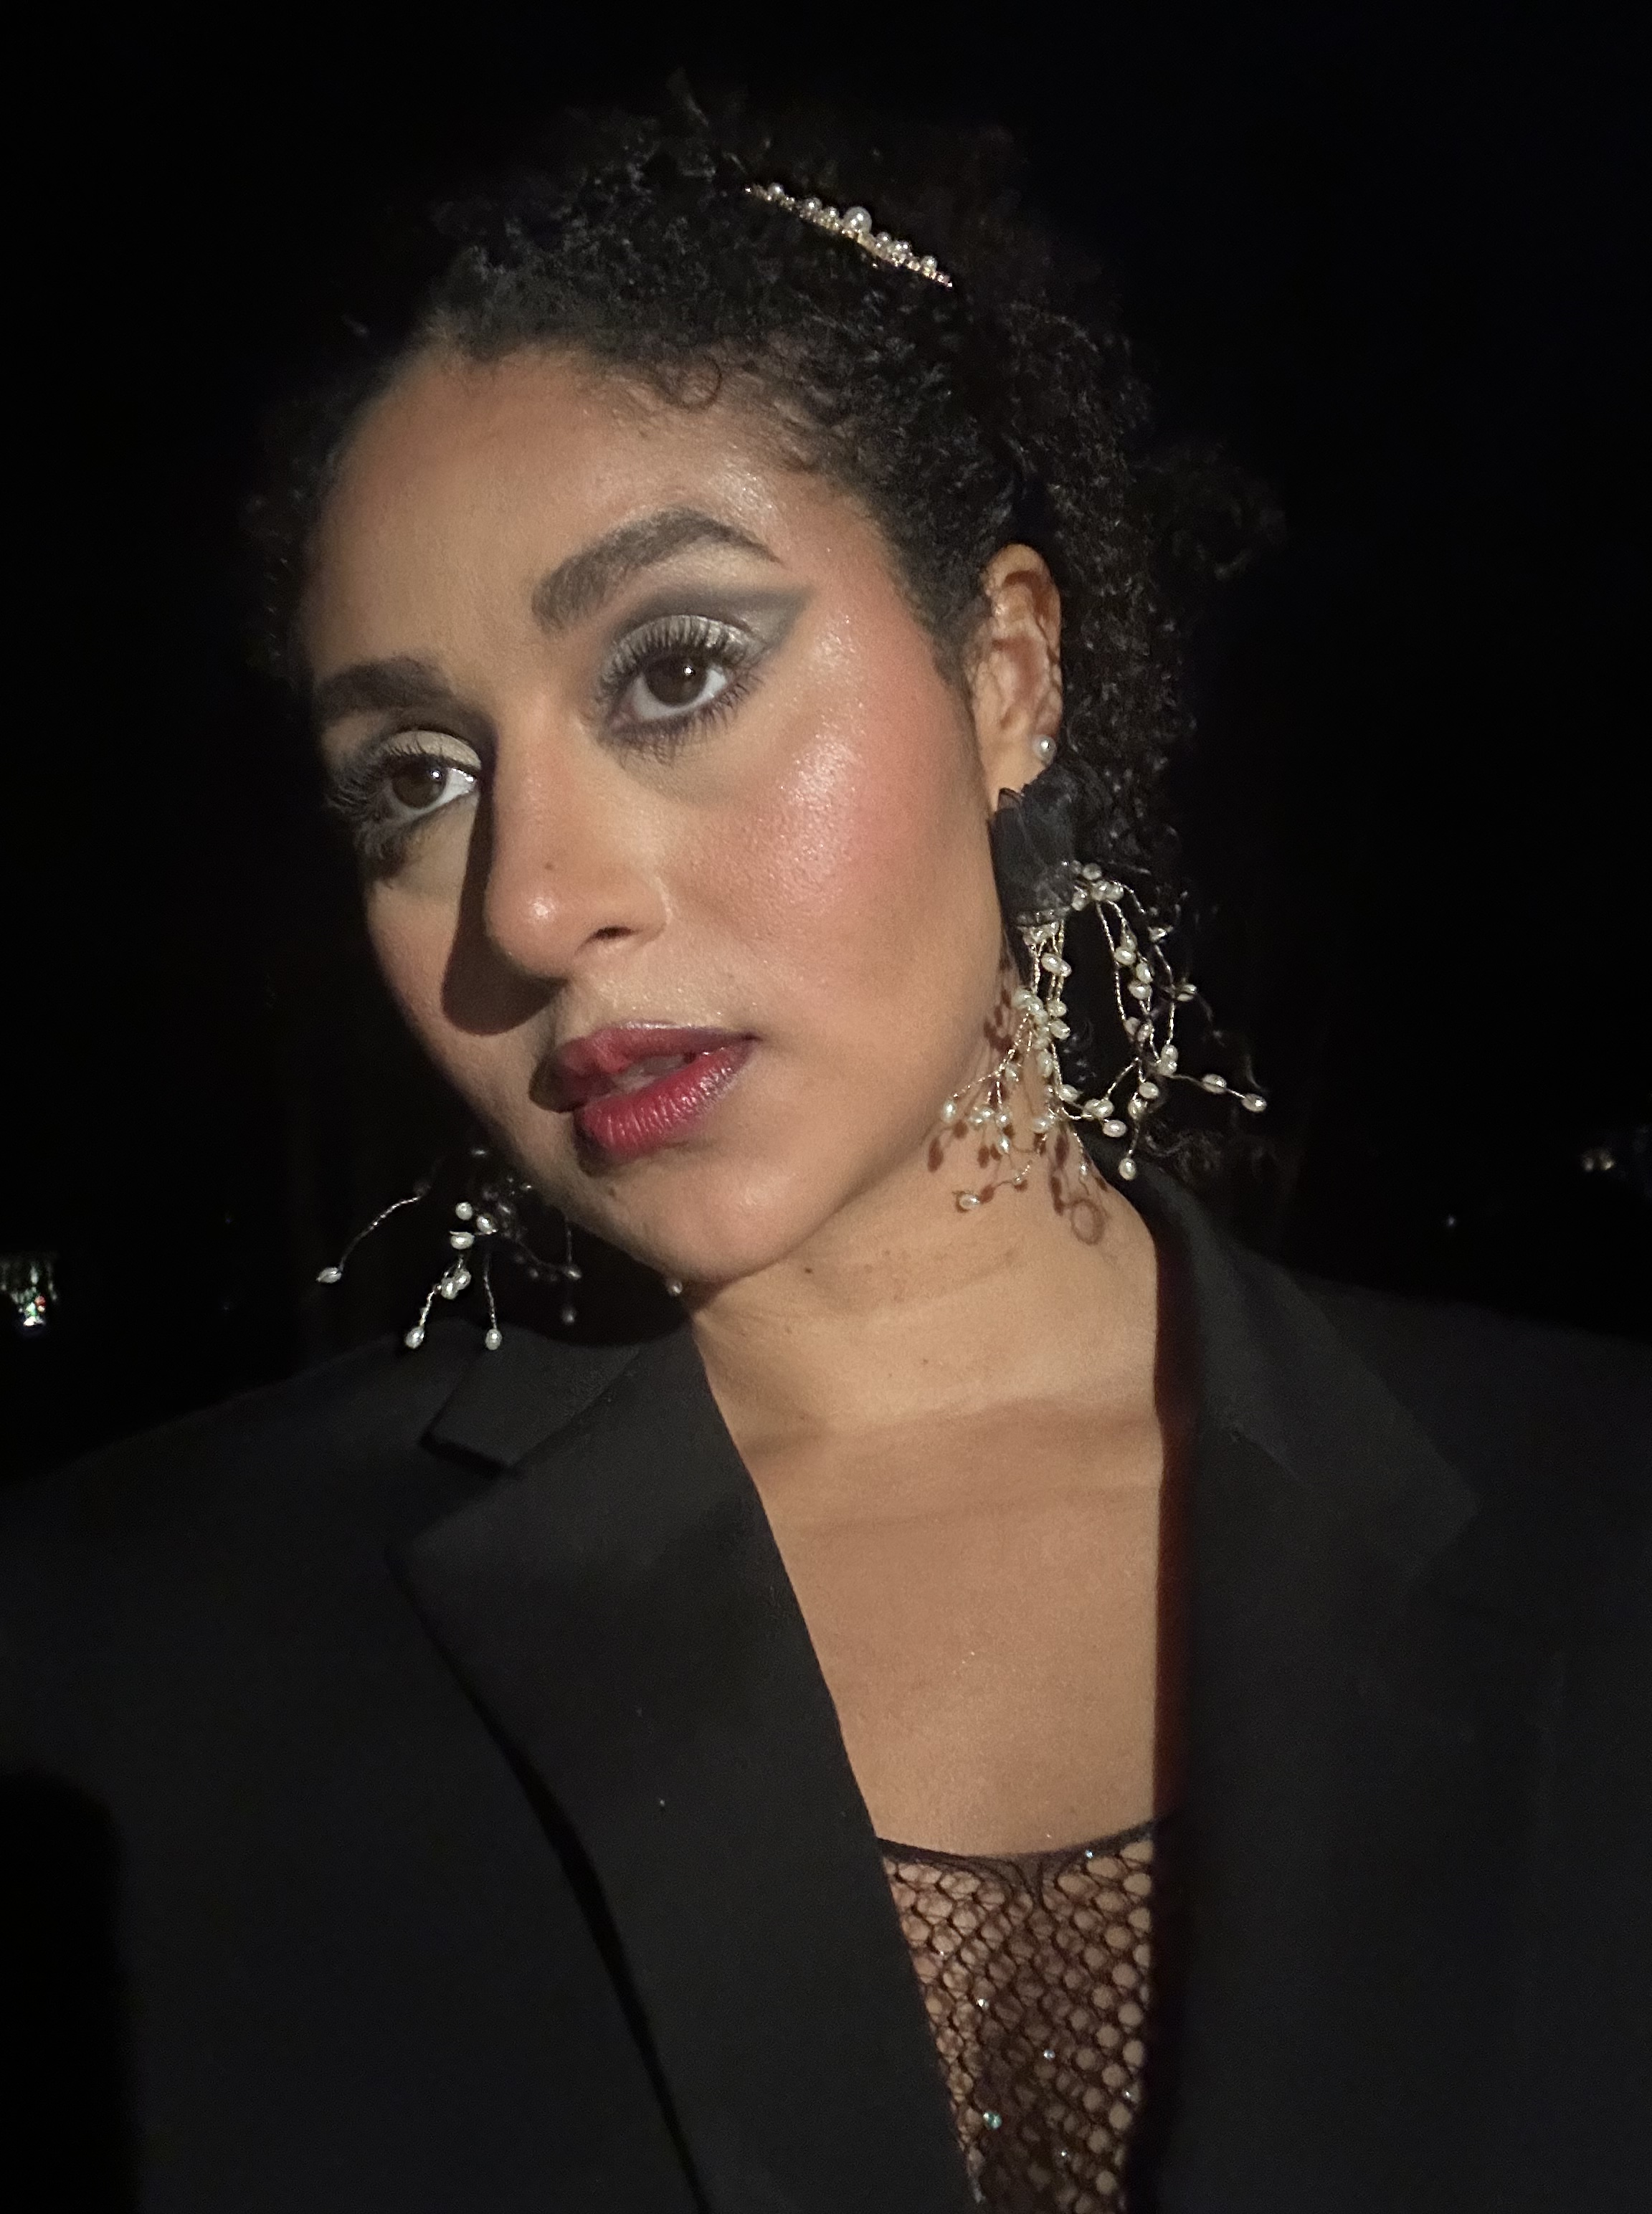
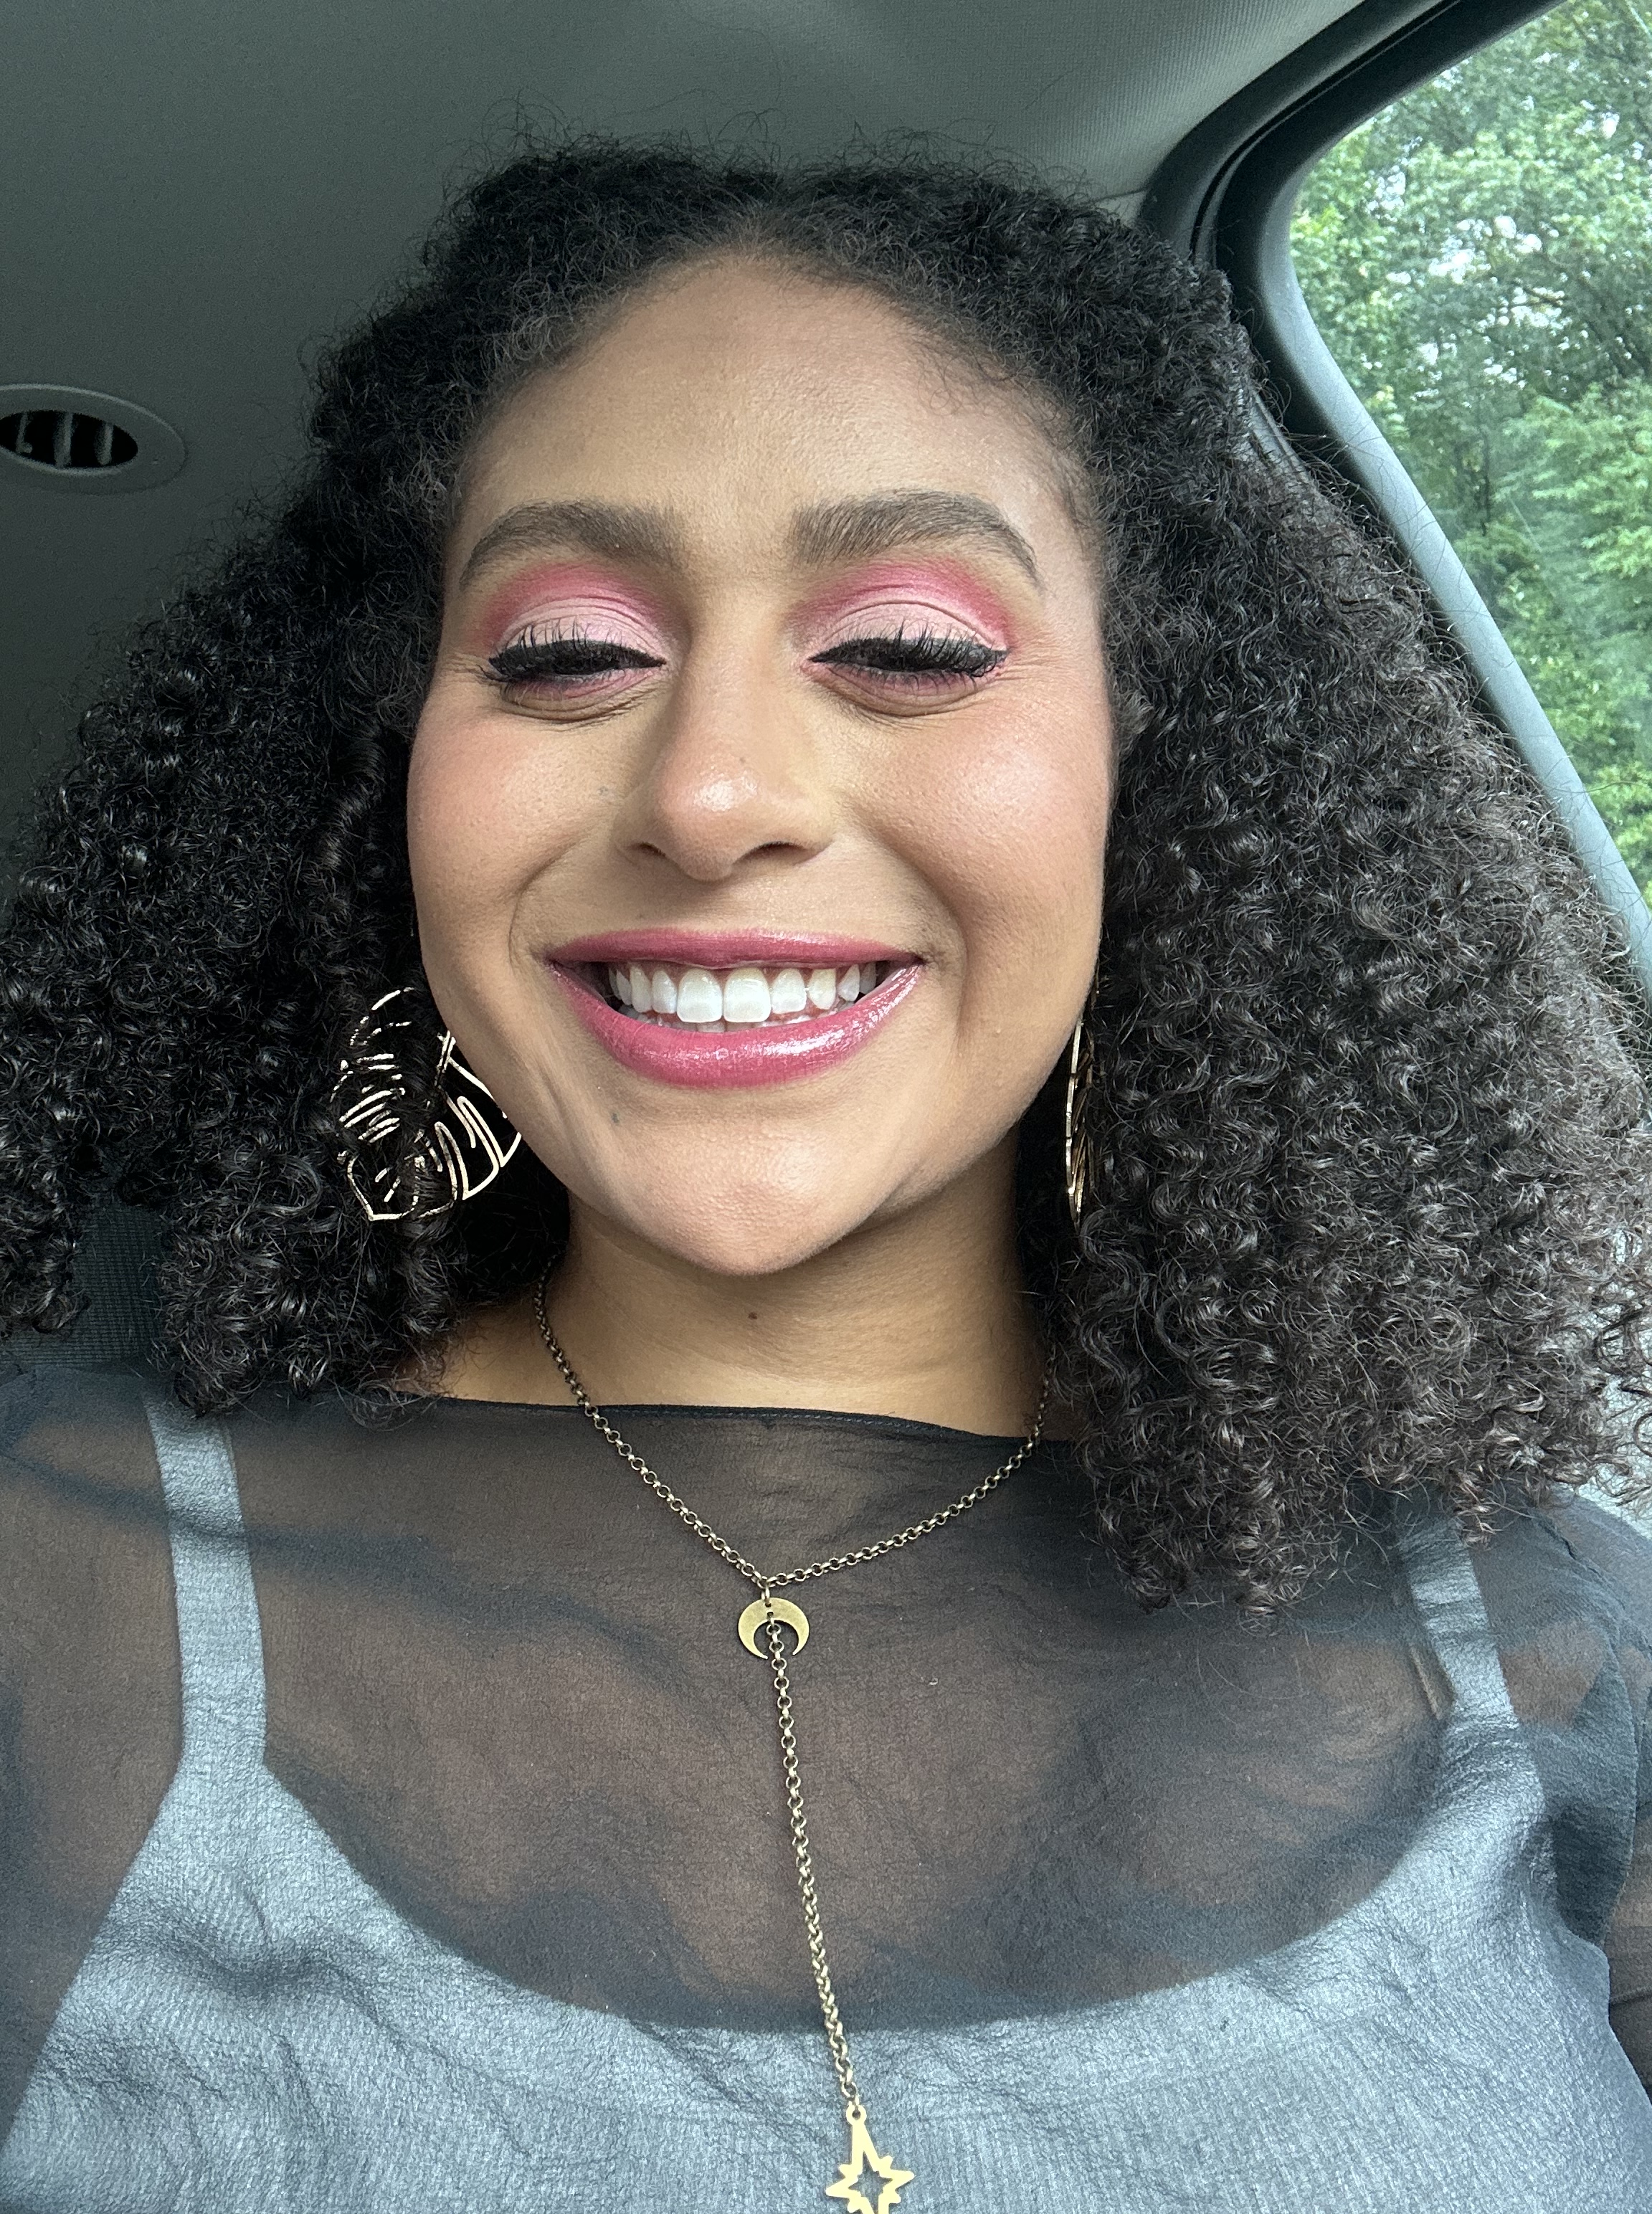
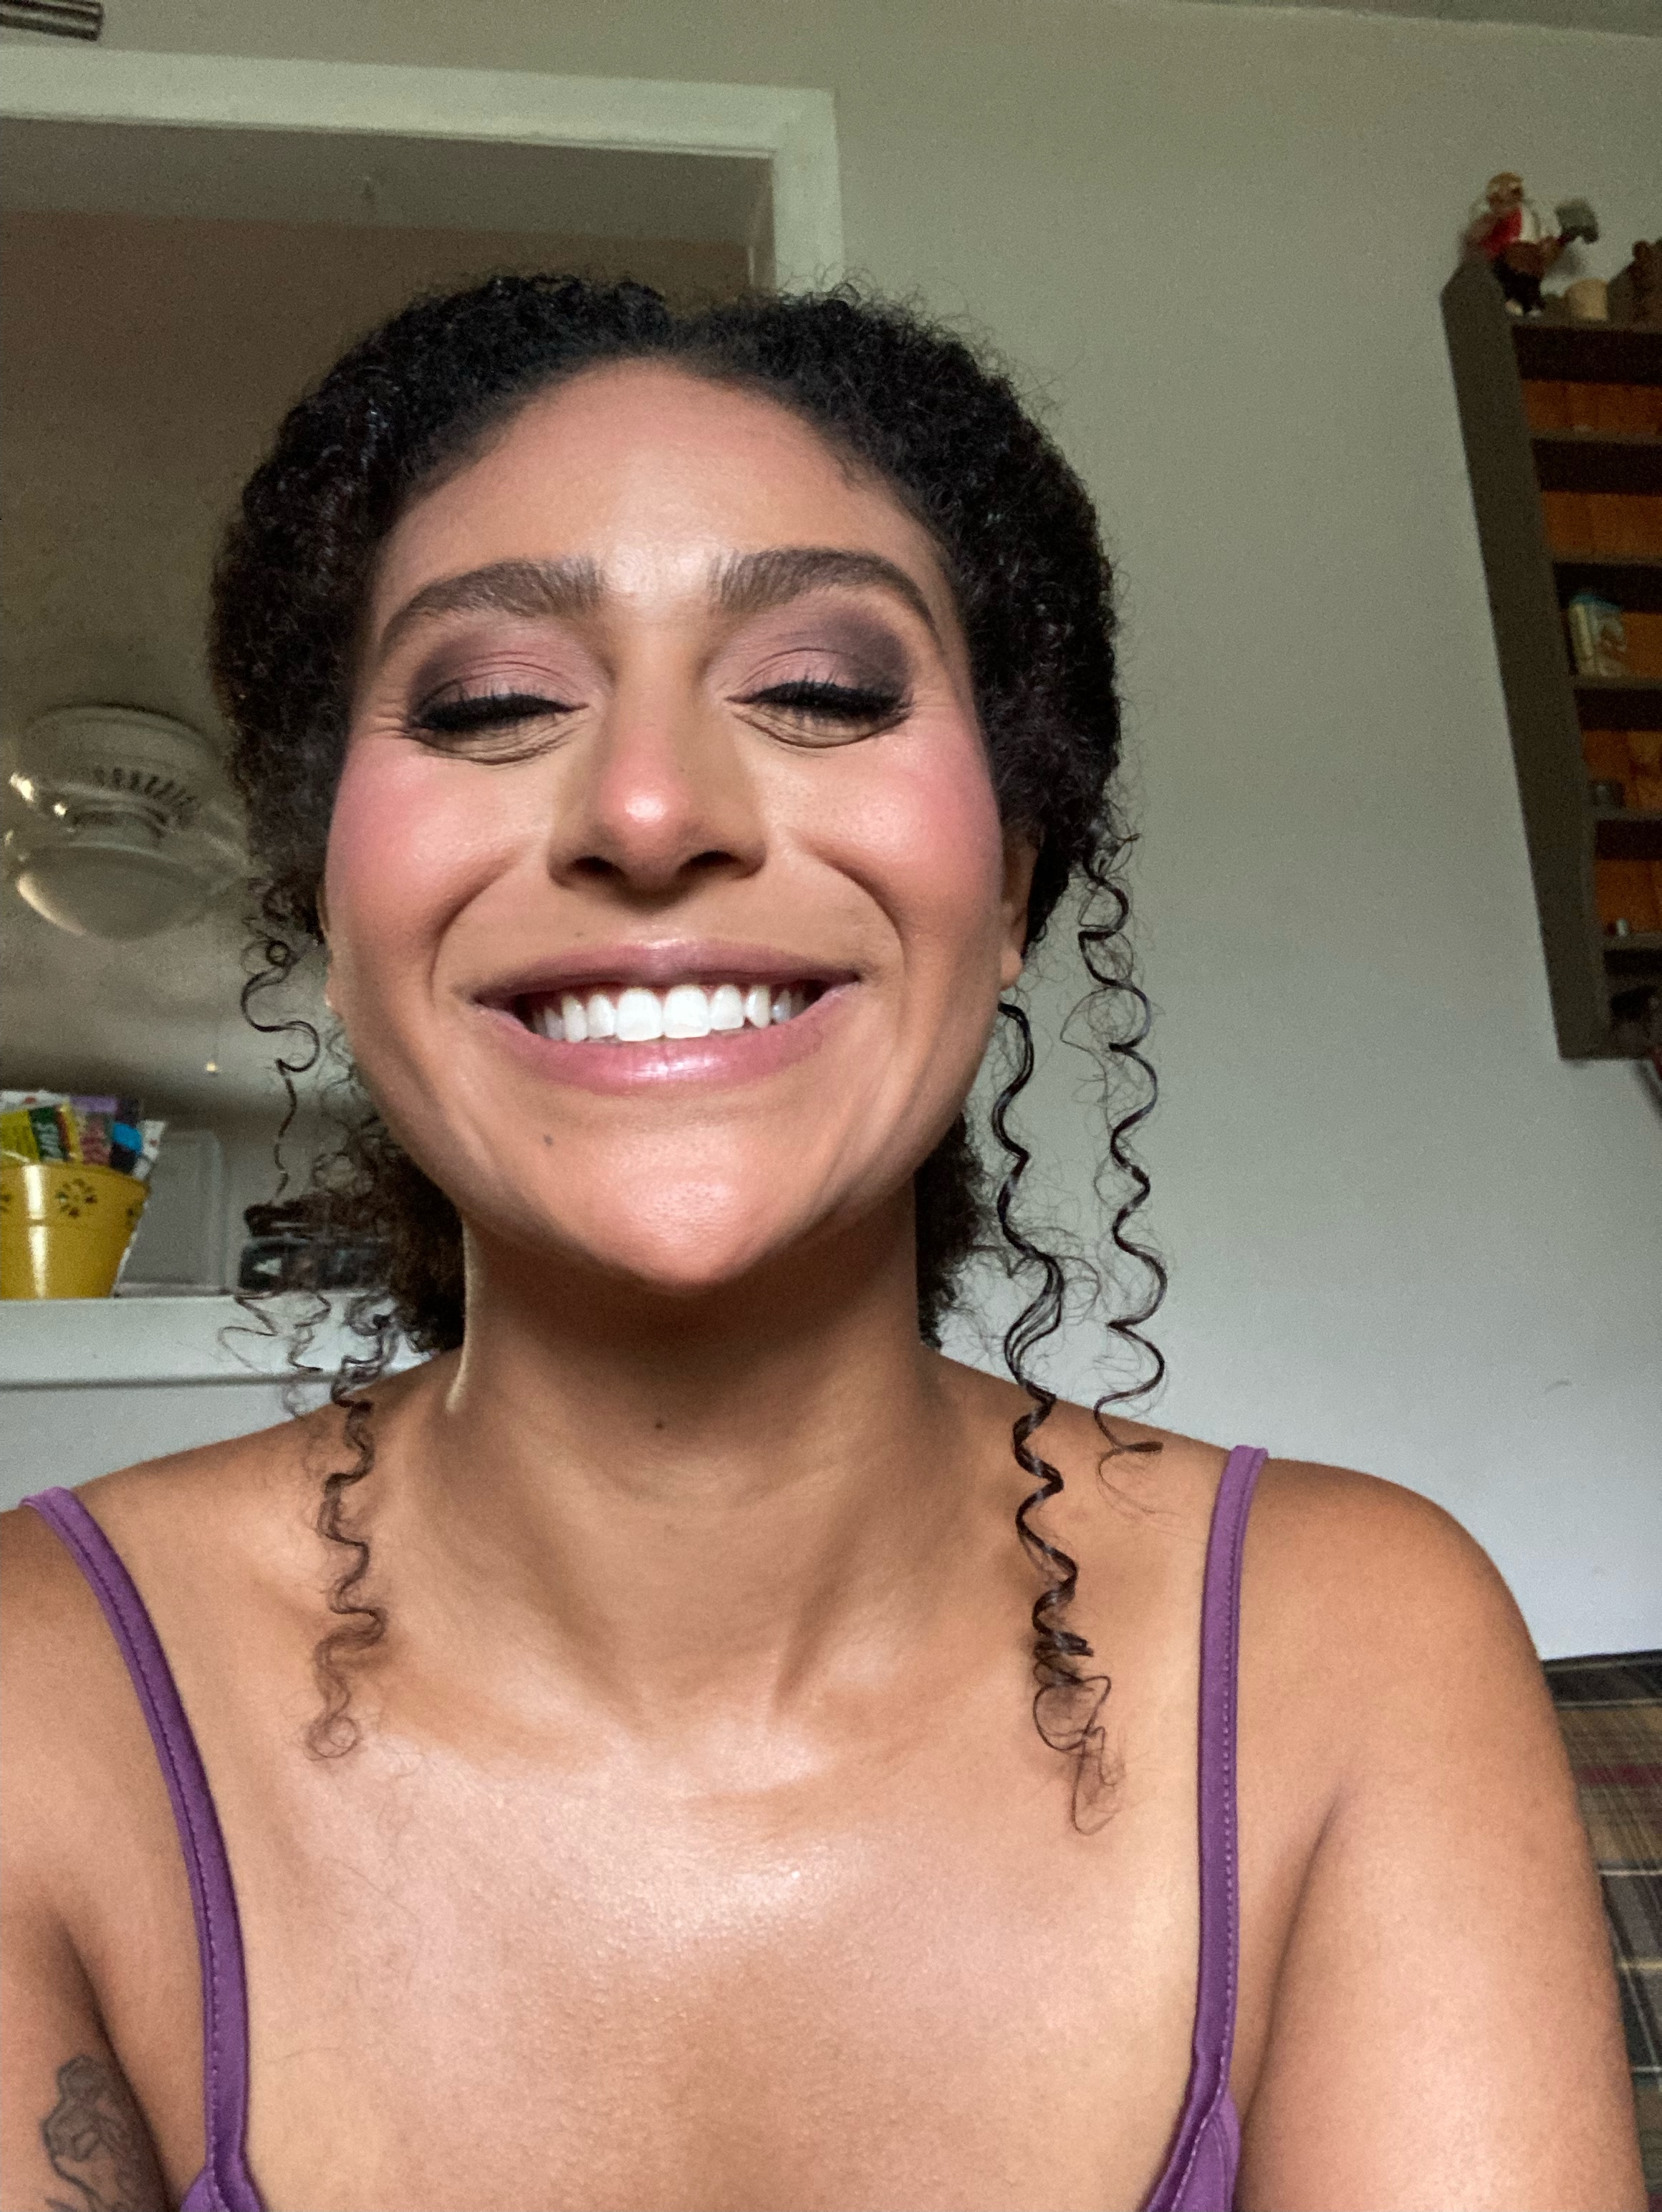
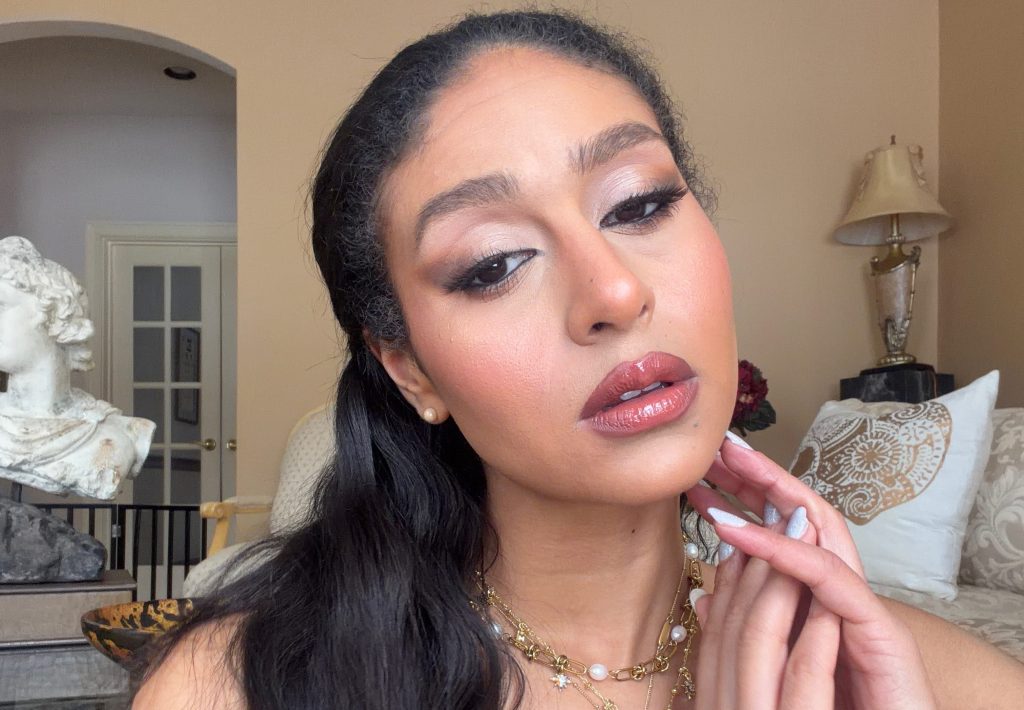
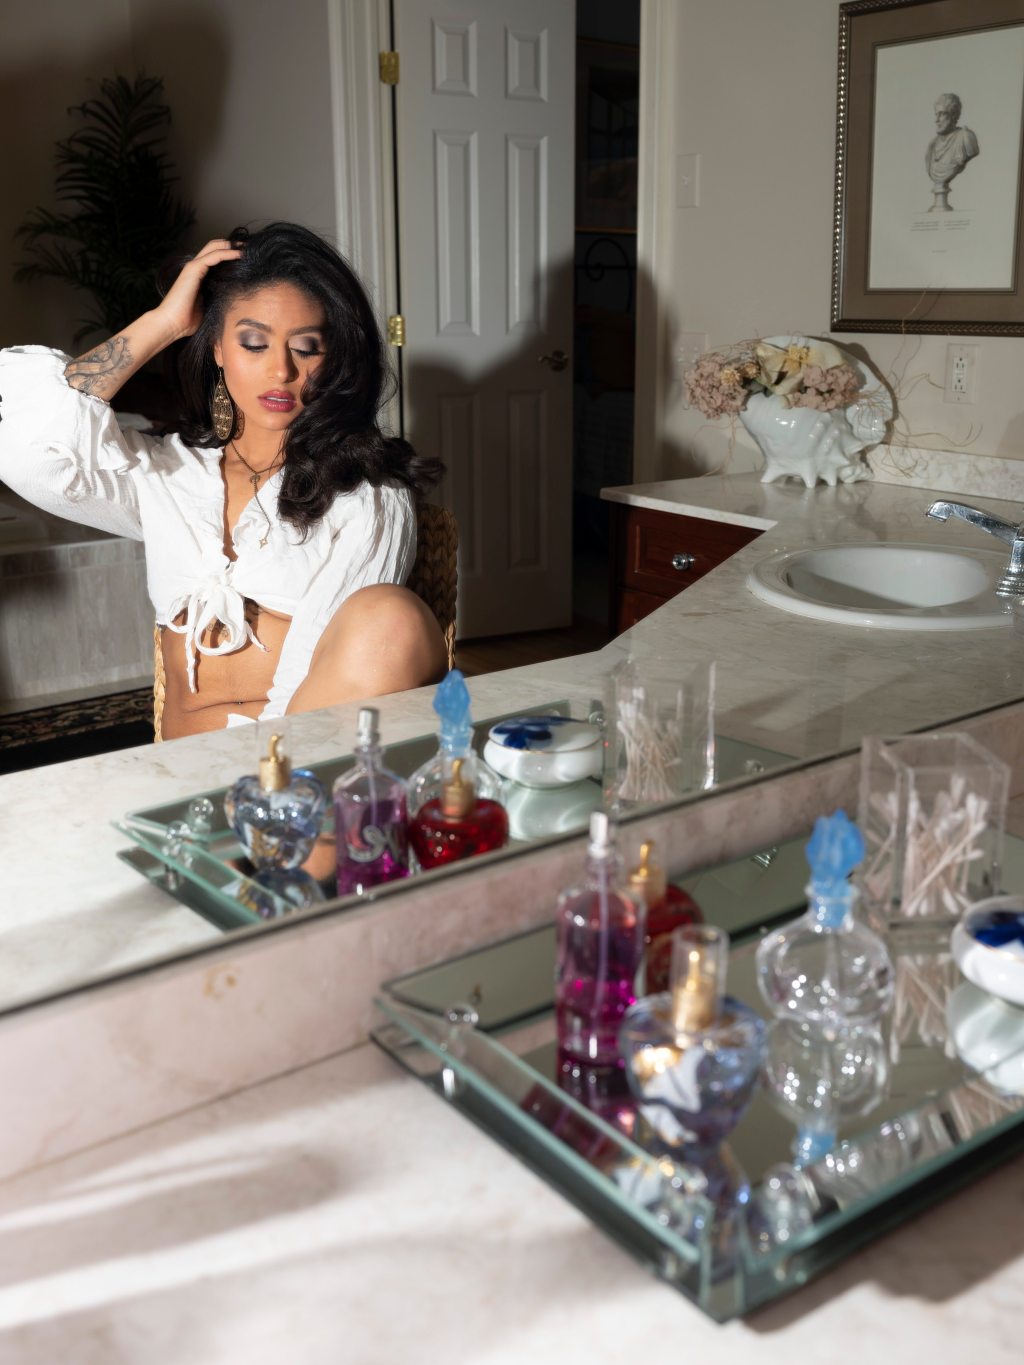
The Final Look
At this point, I’m ready to create any sort of dramatic looks and I’ve included a few of my favorite looks from the past few years! Let me know in the comments section which looks you’d like a step-by-step recreation!
I’ll be back next week discussing how I straighten my natural curls. I hope you all have a wonderful rest of your week, and remember to SLAY!


Leave a comment